WE'LL COME TO YOU.

Since we aren't on every social media site, let us come to you. Enter your email below and we'll send you our monthly handwritten newsletter. It will be written during the hours of moonrise, and include featured posts, wild tangents, and rowdy stick figures. 

Keep the beautiful pen busy.


Brooklyn, NY
USA

Handwritten is a place and space for pen and paper. We showcase things in handwriting, but also on handwriting. And so, you'll see dated letters and distant postcards alongside recent studies and typed stories. 

HW Blog

search for me

Filtering by Tag: Handwritten Recipes

Anise Cookies • Anne James

Bretty Rawson

Anne James - Recipe Anise         Cookies.jpg

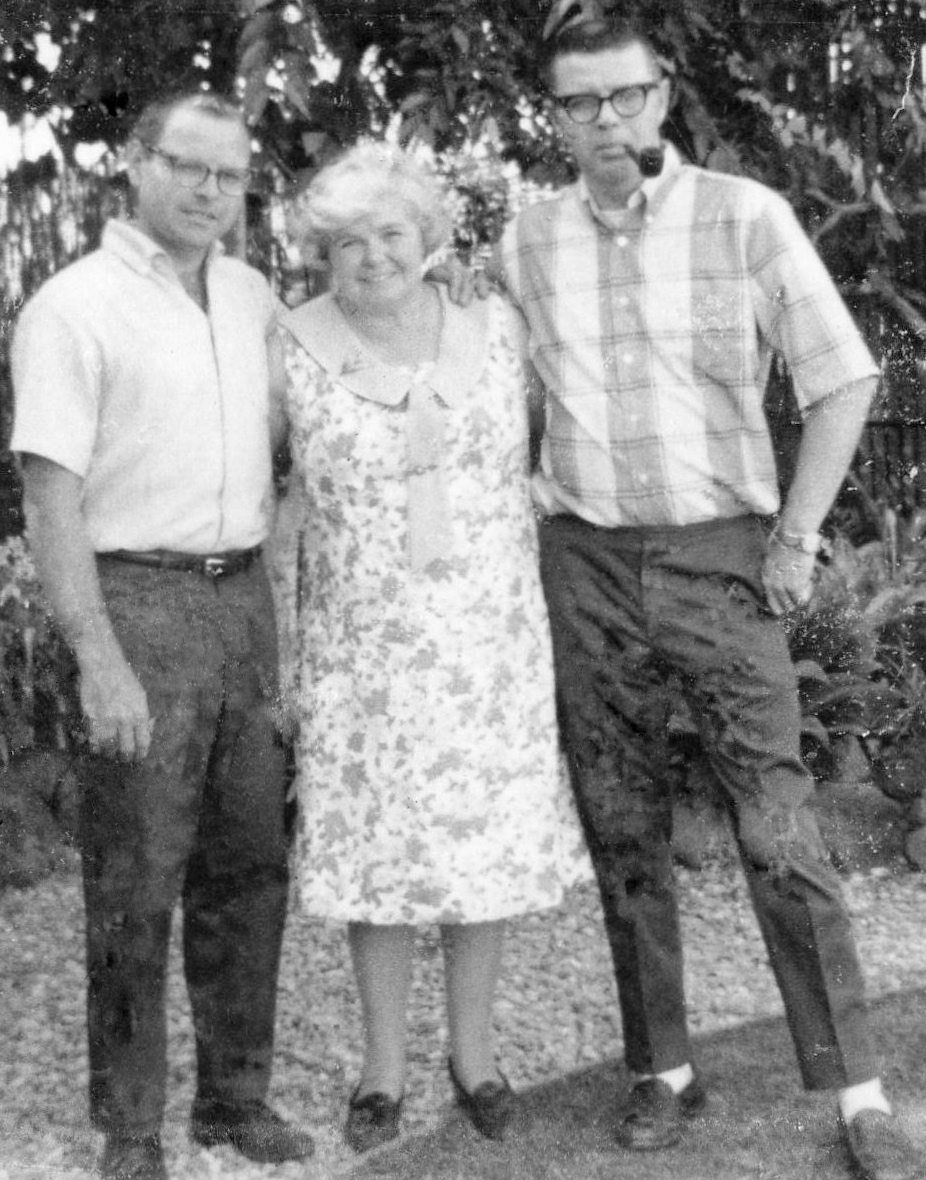
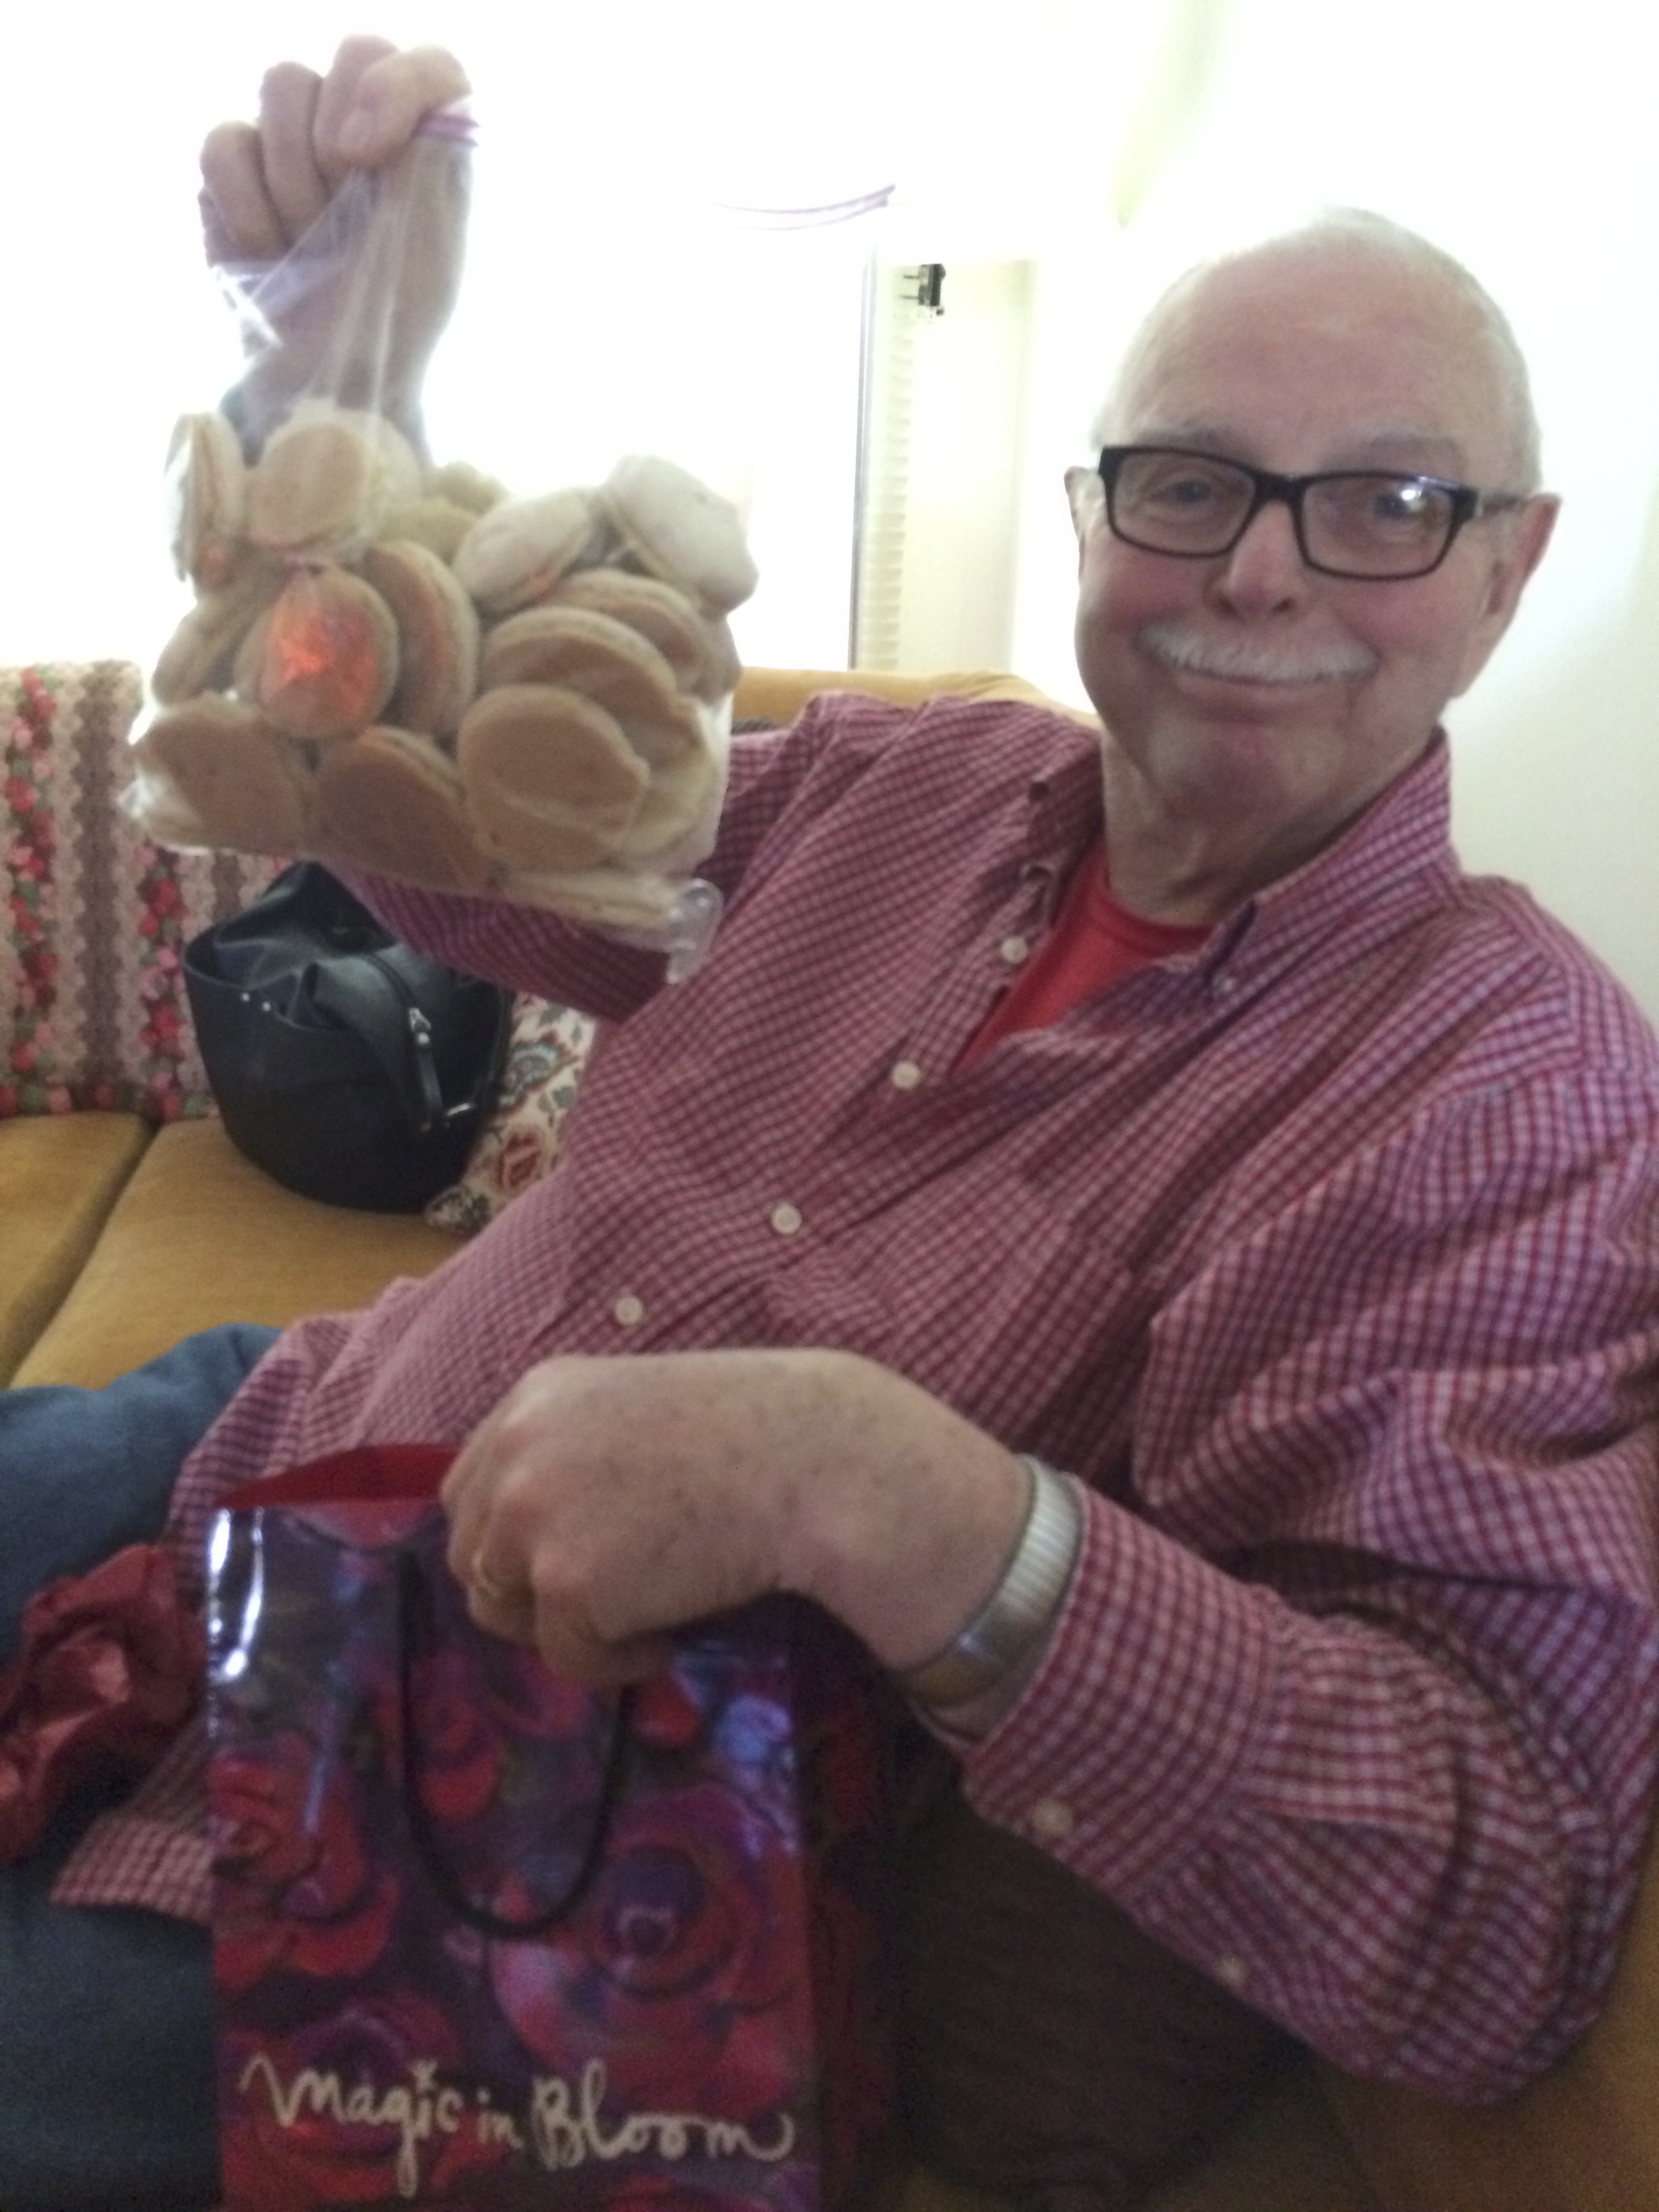
A note from curator Rozanne Gold: There are few more poignant daughter-and-father rituals than this evocative memory shared by Anne James, an Associate Professor of Voice and Movement in the Department of Theatre & Dance at California State University, Fullerton . Anne heard me on Heritage Radio on “A Taste of the Past,” a popular program hosted by culinary historian Linda Pelaccio.  Afterward, Anne wrote, “I was so moved by your project that I wondered how I would go about contributing a handwritten recipe that my grandmother passed on to me?”  That, of course, goes right to the essence of this column:  The reawakening of memory through the swerves and curves of a penned recipe.  And her writing is beautiful… “When he popped open the tin, the sweet, distinct aroma caught him off guard. My father looked at me, stunned. As he unfolded the tissue paper, he tossed back his…” We are grateful to have Anne’s original recipe and wonderful photos of the story’s compelling characters. 

Black Ink Blot.png

Anise Cookies by Anne James

My beloved grandmother, Florence “Flo” James, was a good old-fashioned English cook.  The knee-buckling aromatics of roasted potatoes, sage, and braised meat permeated every corner of my grandparent’s Yucaipa, California home.  The upholstery smelled like pastry.  Baking was her true love. 

Flo was stout, with a fluff of white, curly hair and flushed cheeks, and resembled Mrs. Claus.  Her cookie preparation for the holidays began as early as mid-October.  Clad in her favorite pink gingham apron, she’d happily hand-beat batch after batch.  By Christmas Day she would have plated over a dozen different delicacies: Ginger Snaps, Date Balls, Hazelnut Puffs, Walnut Stars, Coco Krispy Crunches, and Wedding Cakes (with her signature whole maraschino cherry tucked inside!).  Don’t even get me started on her Fruit Cake.

And then there were her signature Anise Cookies.  Flo baked these just for her son, George (my father).  These particular sweets were a maternal gesture that began in the mid-1930s and stretched into my Dad’s adulthood.  One whiff of their licorice scent transformed my father, an internationally renowned watercolorist and professor, into a giddy, little kid.  Holding up a precious nugget as if to expose its facets to the light, he would annually rhapsodize on the elements of the perfect Anise Cookie; the separation of the milky white meringue from the caramelized, caked bottom; the bouquet released with each bite; their miraculous transformation as they aged into a delectable granite-like shard.

Often at my Grandma’s hip, I would be mesmerized while she prepared English staples; steak and kidney pie, Cornish pasties, Yorkshire pudding.  She compiled her favorite recipes into a small, handwritten cookbook that she gifted to me, her only granddaughter.  Thankfully, all of her cookie recipes were included. Then thirteen, I cradled the micro-tome in my hands, awed that she had entrusted me with her culinary secrets.

Grandma passed away in the late 1980s.  Our family stumbled to fill the void left by our own Mrs. Claus.  A decade later, as a graduate student crafting inexpensive Christmas gifts, I remembered the cookbook.

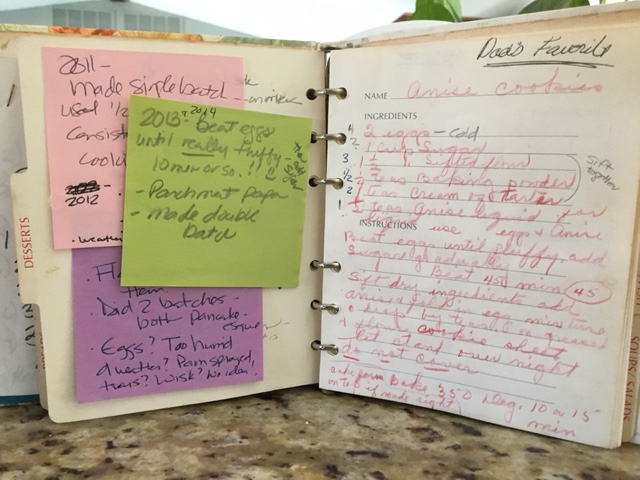
Flipping through the pages, there it was:  her Anise Cookie recipe. The words, “Dad’s Favorite,” were carefully written in my teenage script at the top of the page.  Grandma’s swirly, red-penciled handwriting talked me through it.  Anise liquid was an exotic splurge.  Beat the eggs “until fluffy for 45 minutes.” She mixed these by hand? “Let stand overnight”— I opted to chill them instead.  That was my first handwritten contribution to her recipe.

Christmas morning, I presented my Dad with the tin.  Though eye-ing his toddling granddaughter, he accepted it and distractedly popped open the lid.  That sweet, distinctive scent escaped.  His attention snapped back to the metal box.

He looked at me stunned.

Unfolding the tissue paper, he tossed back his head and let out a soft sob.  Carefully, he picked up one of the creamy gems. He marveled at it for a moment and then took a bite. 

With a deep exhale, he slowly chewed and grinned.  The chaos of Christmas morning swirled on.  But, there he sat, the open tin perched on his lap, blissfully transported: A son unexpectedly basking in the spirit of his mother.  

I baked Anise Cookies for my Dad every Christmas after that.  Before the mayhem of presents, I’d find a quiet moment to slip him his stash.  It became one of our favorite father/daughter rituals.  He’d pop a cookie into his mouth and hum with delight.  We’d study that year’s batch, noting the subtle differences in texture, color, and fragrance. Then, he’d happily scurry away to hide his cookie booty.

I built on Grandma’s recipe, finessing her instructions with each pass; noting the impact of egg size, humidity, and parchment paper vs. aluminum foil.  I tracked them, year by year, on attached Post-It notes.  My last comment was dated December, 2014.

My Dad passed away in March of 2015.  Though his appetite was diminished from years of chemotherapy treatments, he managed to nibble a cookie a day that final holiday season.  It was a touchstone of a well-lived life; one that began simply enough, as a holiday treat baked by a young mother for her cherished first born and, unwittingly, setting into motion an unbroken streak that spanned over fifty years.

I didn't bake this last Christmas.  It is still too painful.  A well-meaning friend, however, knowing of our tradition, baked me a batch of my father’s beloved cookies.  I graciously accepted, but waited until I was alone to open them. 

One whiff of that licorice scent triggered a searing ache of grief.  Too soon.  Maybe next year.

Florence James’ Anise Cookies
My notes are in italics – A.J.

 2 eggs – cold
1 c. sugar
1 ½ cups of sifted flour (I used organic flour)
¼ t. cream of tartar (bought fresh every year – found made a significant difference)
½ t. Anise Extract (ordered yearly from Spice House in Chicago, IL)
(Sometimes I added a touch more. But not too much or else it makes the dough droopy)

Line cookie sheet with parchment paper. Beat eggs until fluffy. (Until really fluffy-at least 10 min or so). Add sugar gradually. Beat for 45 minutes.

Sift together flour, baking powder and cream of tartar. Fold into egg mixture. Drop by teaspoon onto a greased and floured cookie sheet (I used parchment paper). Dough will be sticky.

Let stand overnight – Do Not Cover (I chilled in my fridge overnight uncovered). Chill for at least 10-12 hours. 

Bake at 350 degrees for 10-15 minutes. A cake forms on top if made right. I’d say the top is crunchy with a cake bottom. I used to make a double batch that my Dad would ration through January. But this is my Grandma’s original recipe. These measurements make about a dozen

Anne James - Anne James.jpg

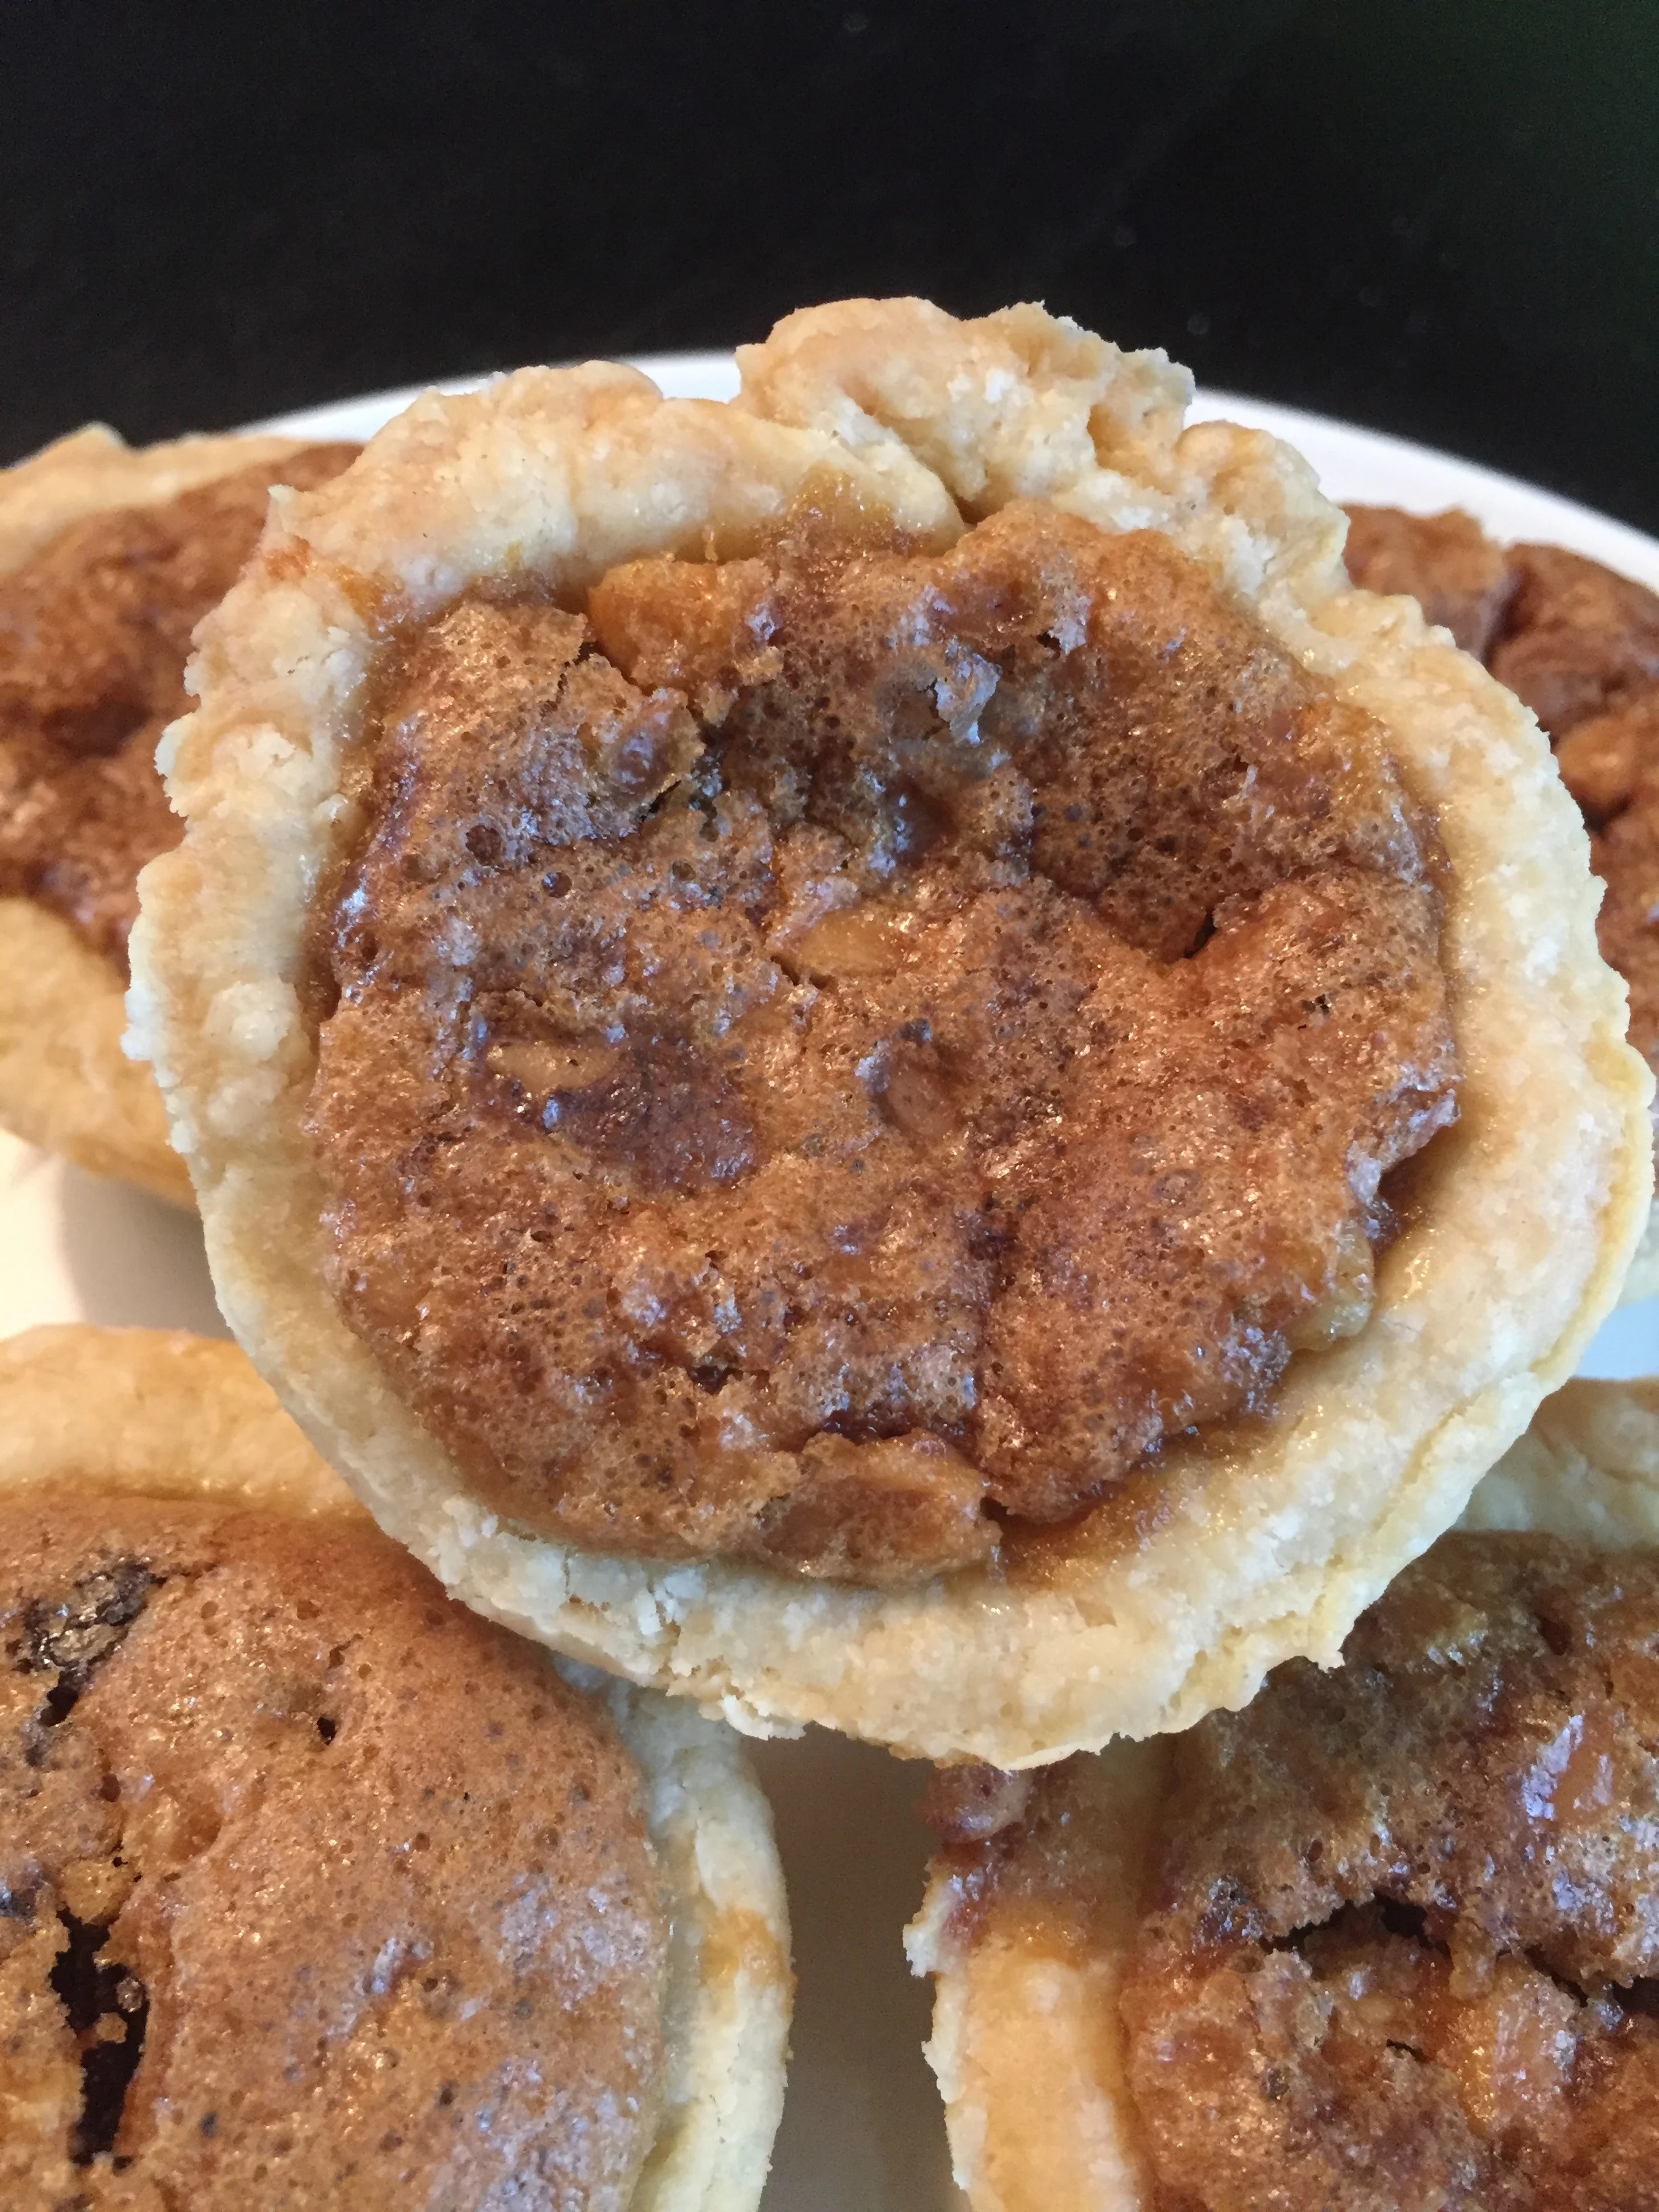
Butter Tart • Kari Macknight Dearborn

Bretty Rawson

A Note from Curator Rozanne Gold: This fascinating article by Kari Macknight Dearborn comes just in time for Canada’s huge 150th birthday party celebration on July 1st.  Canada Day festivities take place throughout the country and wherever Canadians live abroad.  Here, Kari shares her own glorious family history, and that of Canada’s edible icon.  Her step-by-step photos for making the country's beloved butter tarts are at once mouthwatering and instructive. Kari, a senior producer at the Toronto advertising firm, Zulu Alpha Kilo, Inc., is a board member of Slow Food Canada and is currently studying  for her WSET Diploma.  She lives in Ontario with her husband, Paul, and two Hungarian Puli dogs, Luna and Tisza. Many thanks to Allison Radecki for securing Kari’s memories for us...and just in time for the party!  Happy Birthday, Canada.

Click to enlarge

BUTTER TARTS BY KARI MACKNIGHT DEARBORN

As so many of my fellow Canucks count down to July 1st, and to what probably will be the largest national party of my lifetime — Canada’s sesquicentennial celebration of Confederation — we are daily bombarded, and in every conceivable medium, with Canadiana.

This fervor has never been seen in our land of quiet pride and polite patriotism, and it’s odd and awesome at the same time.   Images of beavers and moose, maple leaves, hockey, and all other symbols of my native land, are everywhere this year.  The entire country is red, white, and bleeding nostalgia.

Canada officially came into being July 1, 1867, in case you were wondering what the fuss is about, by being granted a confusing level of freedom from the British Empire. It’s complicated.   Americans went about it slightly differently, I know.  Canada’s separation from Britain was a lot less bloody, and our connection to the ‘Empire’ is still strong today as a result.

We remain a country with very British and French influences because these countries created Canada.  We have two official languages and we’ve raised a bunch of the funny and talented famous people you love.  But my story is not exactly meant to be a lesson in Canadian history.

Instead it is a story about a singular confection; a quintessential Canadian dessert, made with basic pantry staples — the butter tart.  How it came to be such a part of Canada’s cultural identity, and my own, is at the heart of my handwritten recipe.

I was raised in Northern Ontario on the North Shore of Lake Huron, as a consequence of my father’s employ in the mining industry.  My grandmother was an English war bride who married my Canadian soldier grandfather and came to Canada shortly after the end of the Second World War. They settled very close to what would become my hometown of Elliot Lake.

My mother comes from hard-working Scottish Hebridean farmers of the Presbyterian persuasion, many of whom were displaced by the Highland Clearances. They ultimately settled in the rich agricultural areas north of Toronto that resemble, topographically at least, their ancestral homeland, minus the blasting winds from the North Atlantic.

It was in these enclaves of fellow immigrant Scots, and other erstwhile Brits, where these folks baked for weddings, picnics, and church events with the humble ingredients they could most easily procure.

Canadian food historians claim the butter tart’s certain influences from the Scottish Ecclefechan tart and early Québecois pie recipes made with maple syrup and maple sugar, as well as Southern recipes for pecan pie.  These reasons all make sense given our country’s history and the oral tradition of sharing recipes.  The main difference with the butter tart seems to be the individual serving size.  Additionally, butter tarts are runnier than pecan pie given the lack of cornstarch.

The earliest published recipe for the butter tart is from Barrie, Ontario, from 1900 in the Women’s Auxiliary of the Royal Victoria Hospital Cookbook, attributed to one Mrs. Malcolm (Mary) MacLeod.  Since my mother’s Aunt Marion was part of the auxiliary in Barrie in the post-war era, the written recipe here, in my mother’s hand, naturally resembles it.

These tarts were a precious part of my childhood at family gatherings but contained many (to me) vile raisins that I would meticulously remove one by one, wiping my hands on my clothes.  For my wedding in 2008, since I am not fond of cake and my husband adores my mother’s version, I asked my mother to make dozens of mini butter tarts for my guests.  Some of the tarts were even made sans raisins just for me, making it easier to keep my dress free of the gooey filling.  My stance on raisins has since softened.  And if the trend of butter tart wedding cakes ever takes off, you know where it began.

This recipe is classic, unfussy, and consistent but with a slightly loopy script. It’s sweet, and it has that nothing-extraneous Scottishness about it that I rely on.  It’s my mum in pastry form.

My mum, a retired nurse, mailed me the original recipe to use for this piece, but I also have the email she sent me years ago when she transcribed it.  Her recipe for the pastry dough (pate brisee) isn’t written down because it’s burned into her memory, and is also used for her amazing apple pies and much-beloved tourtière.   

Butter tarts have become big tourist draws.  We have a Butter Tart Tour in the Kawarthas area near where my mum grew up, and a Butter Tart Trail near the city of Guelph.  Ontario’s Best Butter Tart Festival and Contest is held in Midland, Ontario, annually.  Whether you add raisins or not, walnuts or pecans, nobody can really agree.  Maple bacon versions and some containing coconut are popular variations on the traditional.  Since I am a purist, I prefer mine with walnuts since pecans are not native to Canada, and would not have been cheap or easy to find here 100 years ago. 

Happy Canada Day!

Butter Tarts (yields 12 tarts)

Note:  You can use your own pastry dough recipe or purchase pie crusts.

 Ingredients

Pastry for 2 pie crusts
2 eggs
1 cup packed brown sugar
1 tsp vanilla
1 Tbsp white vinegar
½ cup melted butter
¾ cup raisins
¾ cup chopped walnuts

Directions

1. Set oven to 400 degrees F.
2. Grease 12 – 3” pie pans (muffin tins)
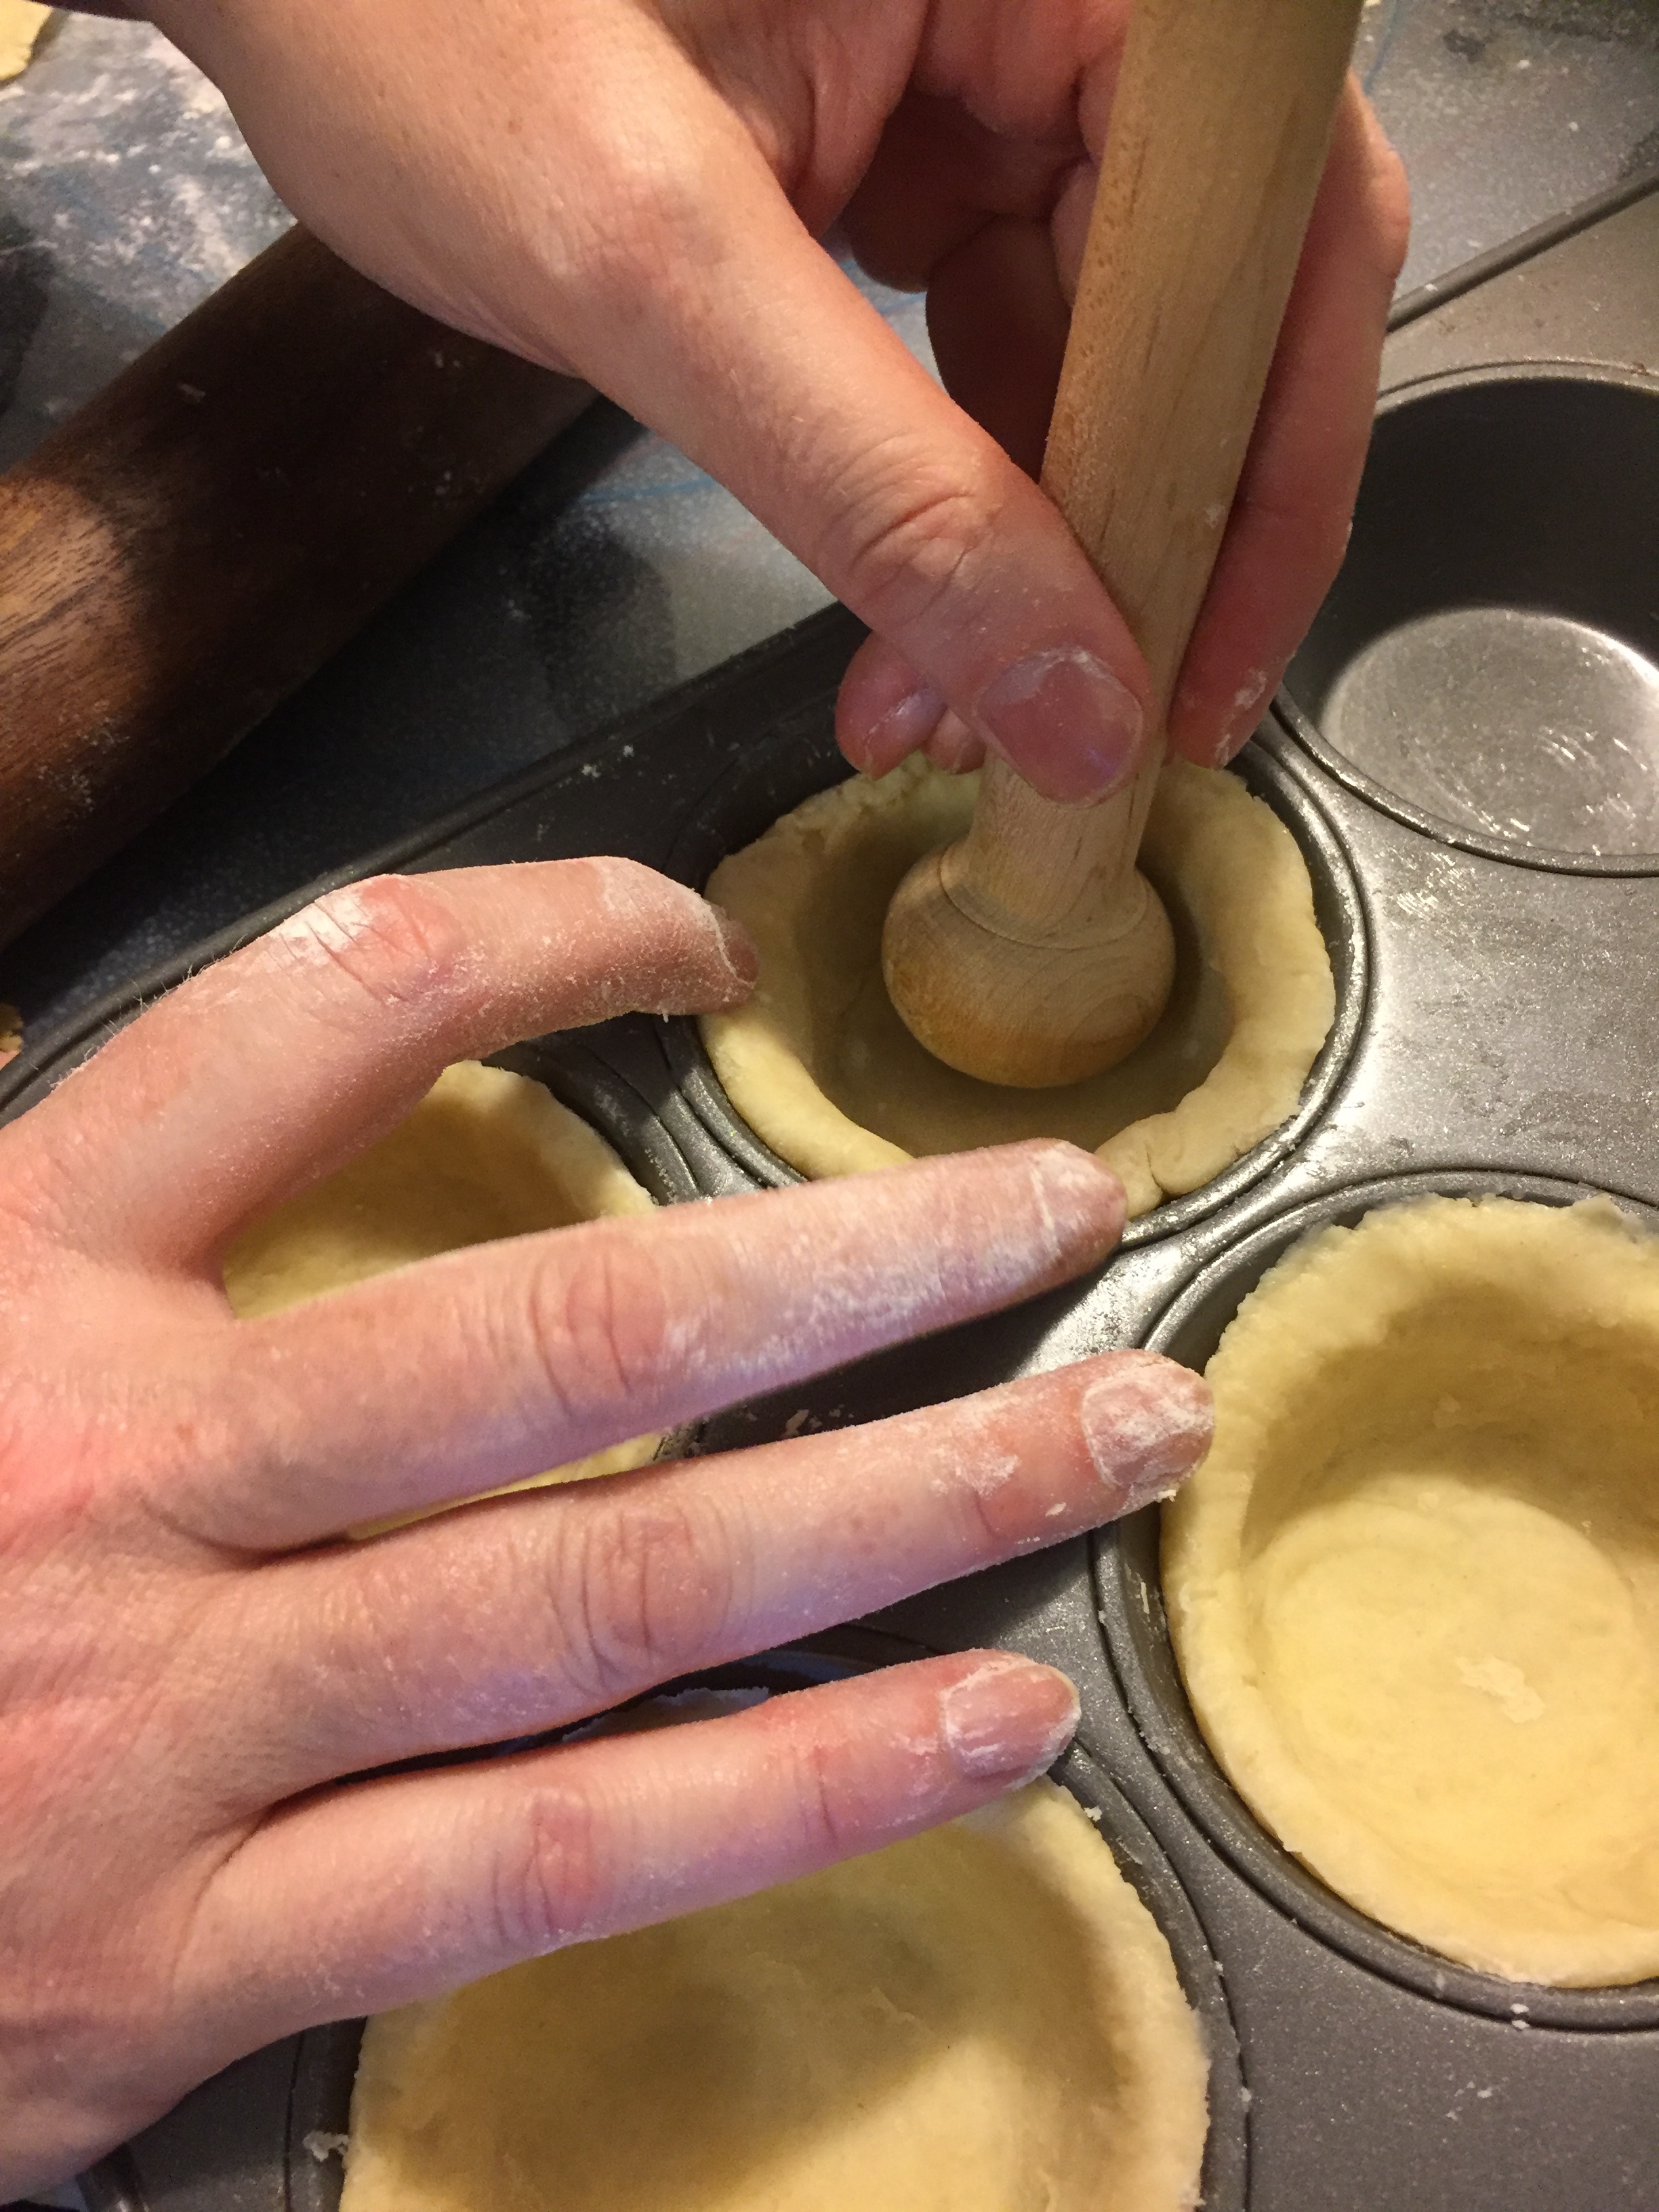
3. Roll pastry and place in pans
4. In a large bowl, beat eggs. Beat in brown sugar. Stir in vanilla and vinegar. Mix well and stir in melted butter. Fold in raisins and walnuts.
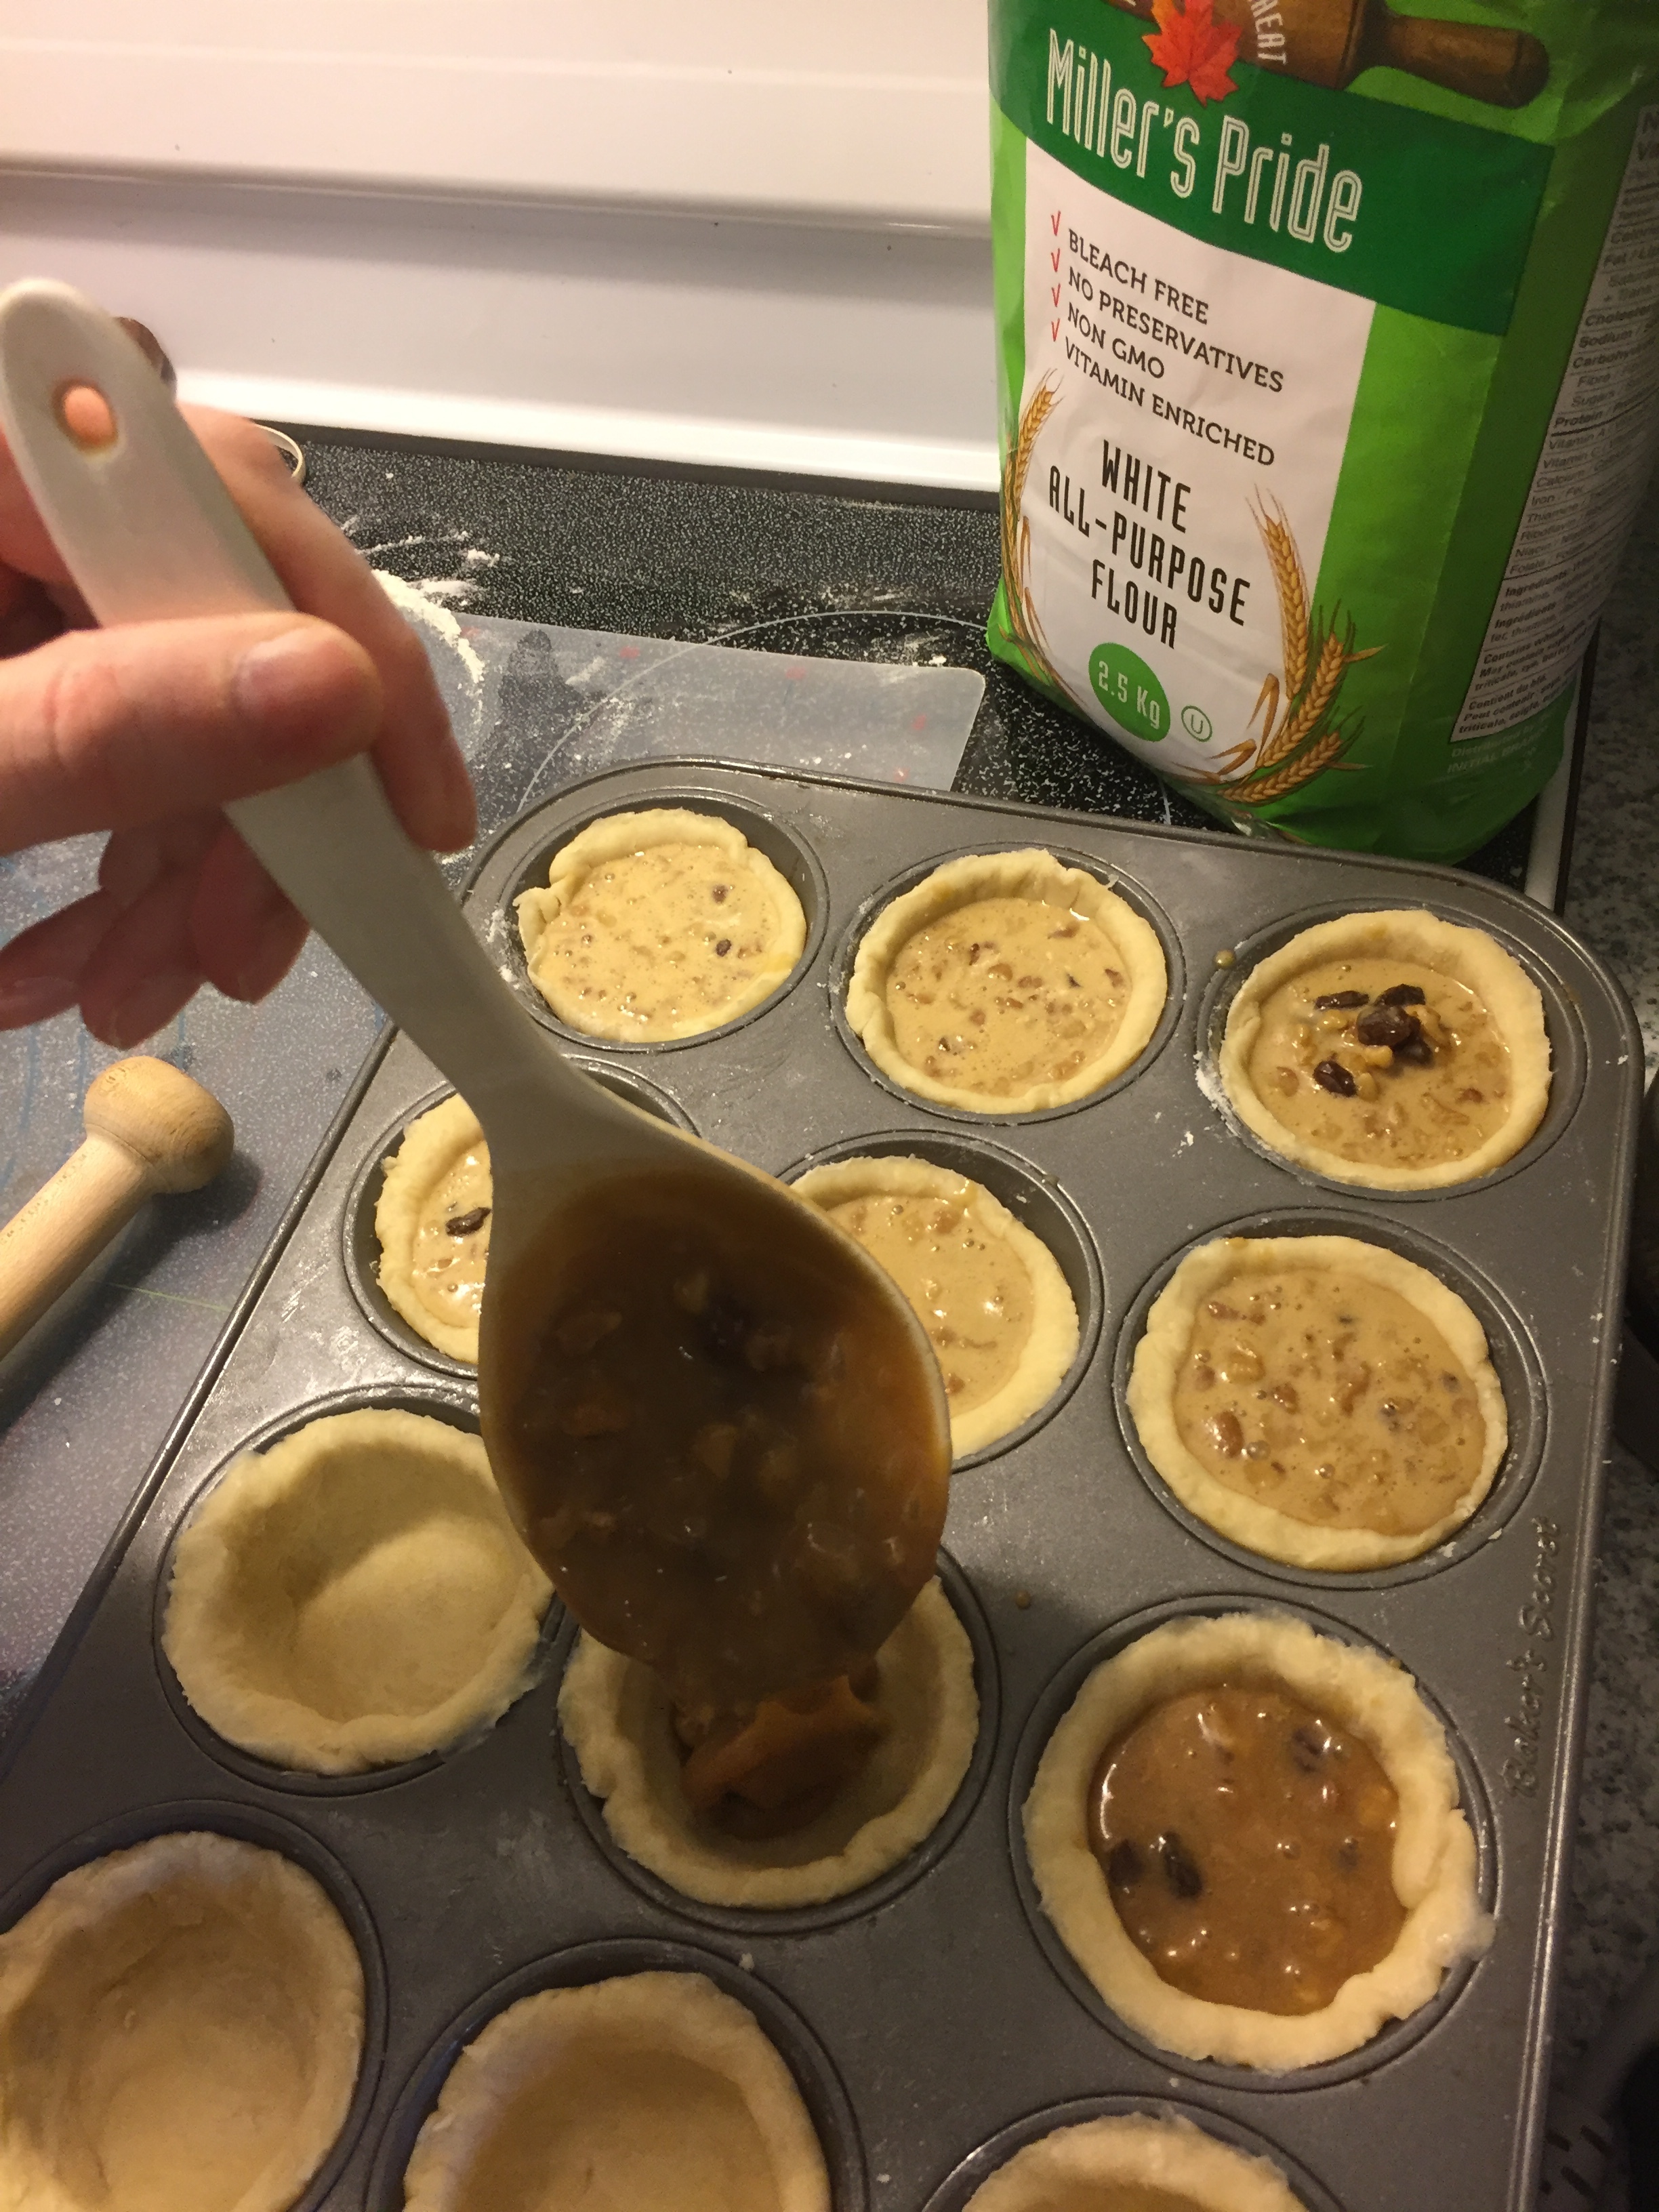
5. Spoon mixture into pans. Place pan on cookie sheet.
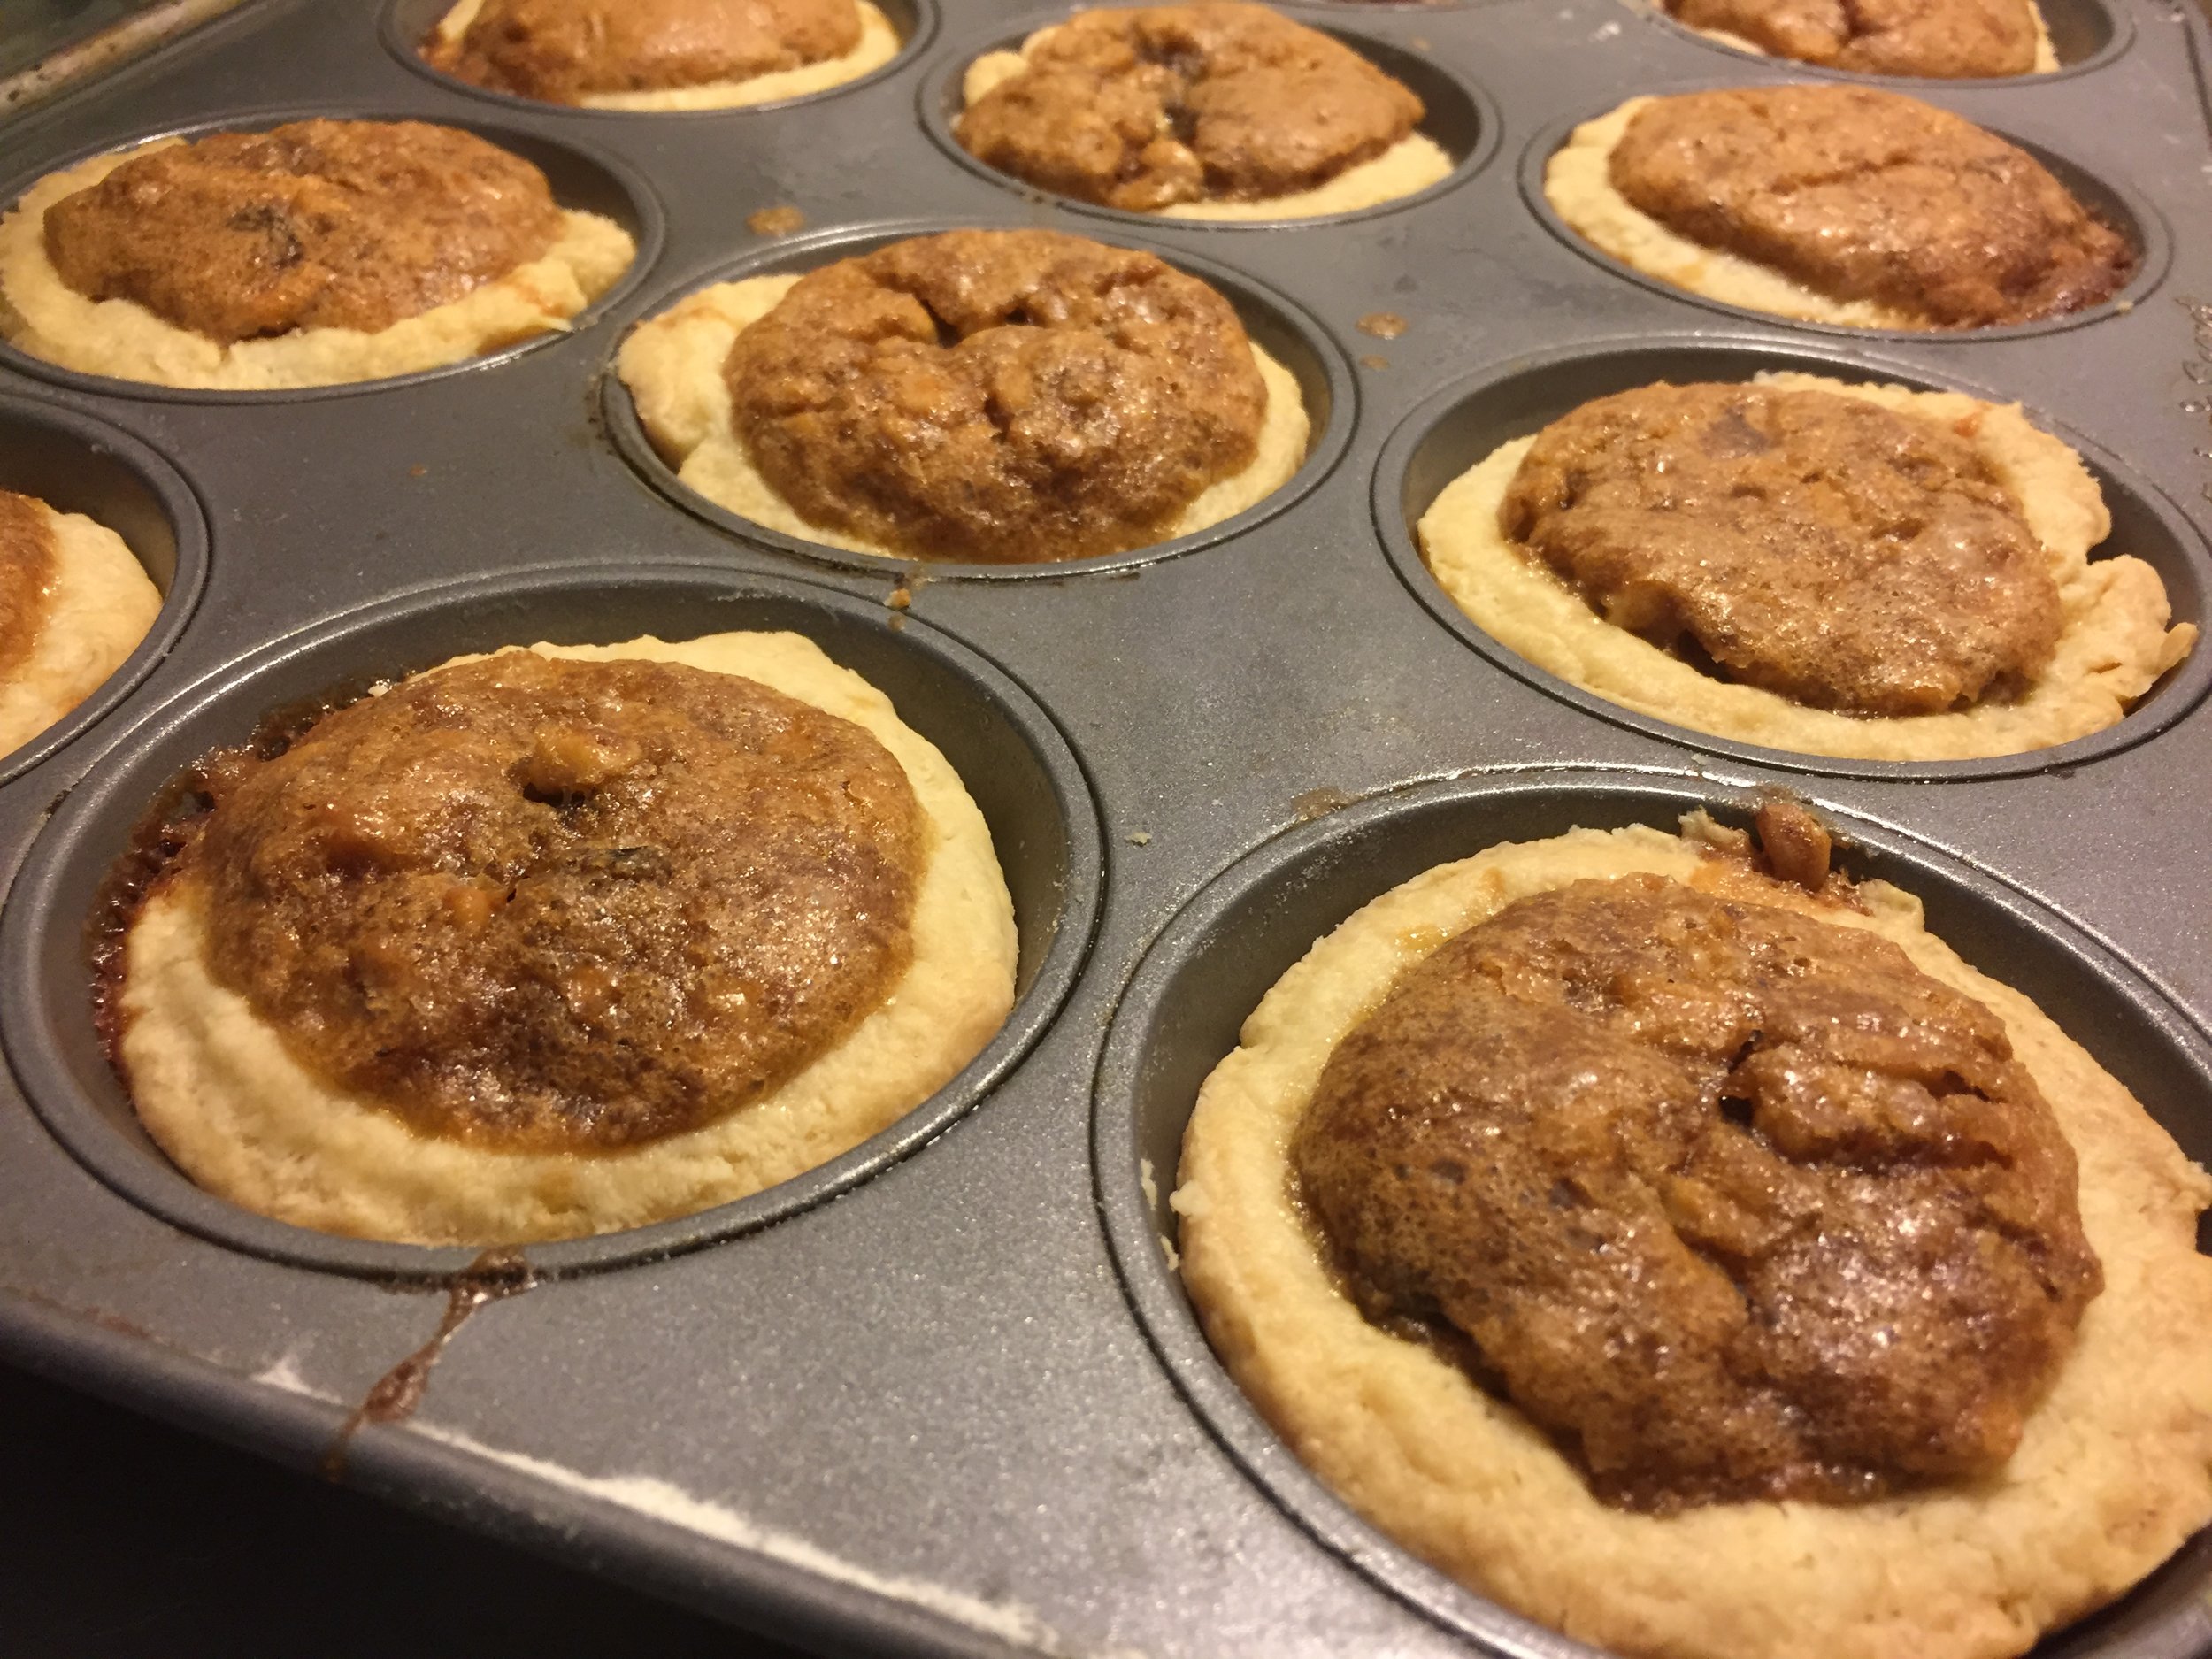
6. Bake for 10 minutes then reduce to 350 and bake for another 25-30 minutes. Let cool.

Lemon Pound Cake • Kelly Spivey

Bretty Rawson

A note from Curator Rozanne Gold: In this beautiful story about a memorable lemon cake (and Brunswick stew), Kelly shares her experience as both a pastry chef and as a devoted member of a tight-knit family.  Kelly’s love of food led her to drop out of graduate school where she was pursuing a Master of Fine Arts to study baking (a girl after my own heart, I also dropped out of grad school long ago to pursue a career in New York’s food world.  I later went back to get an MFA — who knows — so might Kelly). After ten years as pastry chef, Kelly now works at a specialty coffee roaster and coffee bar in Memphis, Tennessee, while she researches and writes about the history of baking and pastry in the south. Southern food ways are so in vogue that I await her gorgeous prose.

In the South, our relatives are our people.

My people come from North Carolina. They were farmers and owners of a general store. They lived in Northampton County, almost at the border of Virginia, where the pine trees were just as much a commodity as the peanuts and cotton. 

My grandmother, Elizabeth Braswell Spivey, was born in Northampton County in 1925.  She lived on a farm very far out in the country.

On the property was a long, rectangular cook-house and an adjoining family room with a fireplace, couches, and games. The cook-house had a large wood-fired brick oven that housed two large cast iron pots, and a cast iron, gas-fueled fryer that only was used for cornbread.    

Starting somewhere in the ‘30s or ‘40s, my family has held a Brunswick Stew every year in the Fall.  We would wake up early for an hour drive to my grandparents’ house, usually arriving around seven. The men hauled firewood to the brick oven and lit the fire. The women gathered in the cookhouse family room to peel pounds and pounds potatoes, and to empty huge cans of tomatoes into the cast iron pots.  

Generally, the men did all the stirring with wooden paddles the size of boat oars, but as a defiant teenage girl, I refused to peel potatoes and insisted on stirring instead. I would sit on top of the warm bricks, next to the cast iron pots, and stir for hours. After three hours it was time to “take up the stew” and fry the cornbread.

I loved how we all came together and took hands as we gathered in a large circle. The head of the family (my grandfather and after he passed, my father), would lead us in giving thanks and each joined hand would gently squeeze the other before letting go.

Finally, we could reap the rewards for our work. Plates were filled with Brunswick stew, pulled pork, slaw, and fried cornbread. Then they filled again with brownies, pig pickin' cake, lemon pound cake, thick slices of pie, and occasionally, ice cream.

We made between 200 - 250 quarts of stew each year, to be shared with family and friends. It was kept in the freezer and sustained us all winter.   

After my grandmother's death in 2013, I received boxes of her cookbooks and recipes jotted down on envelopes or advertisements for fertilizer. Some were just newspaper clippings. I received all of this during a time when, as a pastry chef, I was beginning to delve into my own history and re-create the desserts of my people. 

The earlier recipes are written in cursive so neat you can almost see the lines of the grade school primer it was practiced in. The later recipes become smaller, cramped, and more hurried, making them illegible to the untrained eye. Sometimes there were just notes denoting "good" recipes.

As I worked my way through the scraps of paper and fragile books, I put the ingredients together in my head, tasting every dessert on the sideboard at Christmas and every contribution from my aunts at the annual Brunswick stew.  But it was my grandmother’s lemon pound cake that was in evidence at every gathering.  

The first bite was so good — the tart-sugary glaze on the pillowy, yellow-tasting cake.  The second bite was to make sure that yes, you can taste yellow. To this day, it is the only cake my brother will eat.

My assumption that this cake was a made-from-scratch triumph was quickly shattered when I asked my mother for her copy of the recipe and saw that a box of Duncan Hines yellow cake mix and instant yellow pudding were two of the key ingredients.  I wanted to make the legendary cake for my brother's birthday.  This was years before my grandmother had passed and I was at the very beginning of my pastry career.  (I’m now 33). 

I tried to reverse-engineer it — omitting the instant pudding and cake mix (the horror!) and adding in real lemon zest and juice — but the results were never as good.  Some things are best left alone.  My grandmother understood, after all, that a cake is just a reason to gather together.

Lemon Pound Cake

Note:  Kelly says that she often uses a Kitchen Aid with the paddle attachment and beats the batter for 8 minutes.  Her grandmother did it by hand for 10.  Pour the batter into a large loaf pan that has been brushed with oil and lightly floured.  Although the handwritten recipe does not include instructions for icing, Kelly prepares a thin glaze made from 1 cup of sifted powdered sugar and 2 to 4 tablespoons of fresh lemon juice.    

INGREDIENTS: 

1 box Duncan Hines yellow cake mix
1 box instant lemon pudding
2/3 cups water
1/2 cup Mazola oil
4 eggs
Lemon flavoring to taste

DIRECTIONS:
Put in mixing bowl and beat for 10 min.
Preheat oven at 325. Cook for 1 hour
Does better if you do not open the oven door until the hour is up.
Makes 1 cake

20170603_192054.jpg

Kelly Spivey (left) and her grandmother, Elizabeth Braswell Spivey (above)

Pasta alla Norma • Allison Radecki

Bretty Rawson

A Note from Curator Rozanne Gold: This dreamy essay comes from food writer and fabulous home cook, Allison Radecki, who describes her recent trip to Sicily in such a way that we experience an intimacy with her.  Through her eyes we taste the pleasures of food and friendship, and get an up-close view of one of the world’s largest religious processions, La Festa di Sant’Agata, celebrated annually in Catania (Sicily’s second largest city) from Feb. 3rd-5th with the heart and soul of an entire community.  Sant’Agata, the city’s patron saint, is also lovingly known as “La Santuzza” — the little saint — in the local Catanese dialect.  Allison’s beloved friend, Mario, whose family home is in the Canalicchio neighborhood, teaches cooking at Catania’s“Piazza dei Mestieri,” preparing high school students to enter the restaurant world.  They met while attending The University of Gastronomic Sciences in Italy’s Piedmont region, years ago.  Pasta alla Norma, Sicily’s quintessential dish is something Mario and Allison make every time they are together — a ritual they share whether in New Jersey or in Italy.  I, too, remember eating Pasta alla Norma every day when my husband and I travelled to Sicily — an island of volcanic pleasures.  Grazie mille to Allison for her beautiful handwritten recipe, and for the joy that accompanies it.  

BY ALLISON RADECKI

All you needed to see were the words “Flash sale to Europe” in your e-mail inbox, and you started to daydream. In a swirl of logistics and calculations you manage to free up a few days of freedom and click on two words that always forecast adventure:  BUY TICKET.  

And you’re off.  

The plane goes up and down and up and down again until you land at Catania-Fontanarossa Airport.  And there he is, your brother from another mother, who just happened to be born in the shadow of Europe’s largest volcano, beside the sea.  You stare at each other, in disbelief; with excitement; with love. After all, you have just made the seemingly impossible possible (at this particular moment in your life) and have three of the world’s greatest gifts before you: Friendship.  Time.  Sicilian food.  

You are really here, on this island kicked into the Mediterranean by the toe of Italy’s boot.  Mario’s car winds through the port, past freighters and petrol tanks. Soon, you are offered a taste of this new place, at a kiosk that overlooks a bobbing fleet of docked boats.  With a press, a squirt, and a stir, you sip your first glass of “selz, limone e sale.” It tickles your lips and tastes like the marriage of a lemon grove and the salt water before you.      

At home in New Jersey, you wrapped your neck in a heavy scarf and scattered salt on your steps to stop from sliding on the ice.  But here, the sun is strong.   You sit and sip espresso together in the shadow of stone buildings as Mario attempts to explain what you are about to experience.  You contemplate what this street will look like for the next three days as the city stops to honors its patron saint, whose bones will be pulled on a silver carriage — up hills and down thoroughfares — drawn by an endless ribbon of white-clad devotees, as it happens every year.  That very night, you twirl your fork in a bowl of spaghetti, cooked al dente, in an attempt to catch every creamy bit of sea urchin that remains in your bowl.  

The next day is electric.  Brass bands chase towering candelabras through crowds.  Velvet curtains hang from high balconies. The saint’s face is visible everywhere, on street corner magnet stands and balloons that fly overhead.  Amidst the call of trumpets and the shouts of candle sellers, you duck into a crowded bar and are handed “la raviola,” fried half-moons filled with sweetened ricotta.  Powdered sugar snows down on your shirt and sleeves and you laugh.  

The following morning begins at 4 a.m. with a long walk to the Piazza Duomo (parking during the Festa di Sant’Agata is — as you can imagine — a holy mess).  And though the city is still in darkness, the streets are alive with footsteps, voices, and the whirr of the milk frothing for cappuccinos to be sipped by men and women dressed in white.   At the mass at dawn, handkerchiefs wave and a city sings out to welcome its protector.  That afternoon, you watch from a high perch, surrounded by Mario’s family and friends — Giogió, Saro, Claudia, Daniele, Daria — and nibble fat, golden arrancini, as the saint sails past on the street below.  

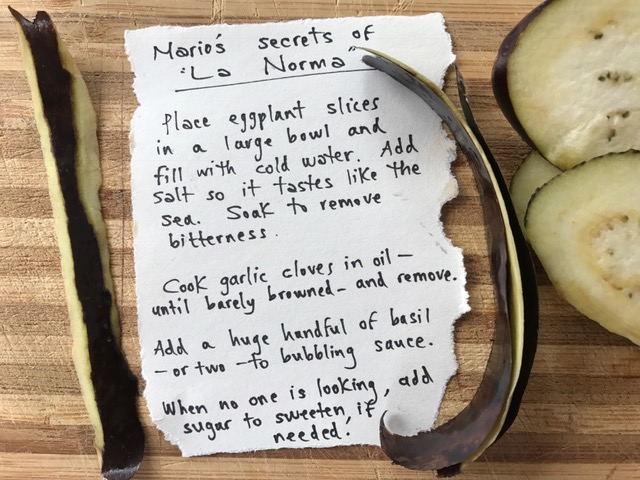
That night, at his family table, Mario, an exemplary teacher, cooks “La Norma," the pasta dish of his city, named after the operatic masterpiece of Bellini, another jewel in Catania’s crown.  And, even though he regrets that it is not eggplant season, (“when they will be sweeter and more delicious”) you try to memorize the way in which the slices are bathed in salty water to release their bitterness, and how he unites the pasta, tomato sauce, basil, fried eggplant and shavings of ricotta salata, so that the result seems to echo Mt. Etna, which smokes in the distance.  

After a night where massive candles, like tree trunks, line the sidewalks of the city, the saint says her final farewell.  That is, until next year, when it will all begin again.  And soon, with a final coffee and a bear hug of an embrace, you board the plane to return home.  

Domani.  You wake up to a snowstorm which cancels work and offers you an unexpected day of rest.  You are thankful.  And, though you can hear the scrape of shovels on sidewalks as you slowly acclimate to the new time and your old life, you dream of eggplants and basil and start to think about dinner.

PASTA ALLA NORMA
Adapted from a recipe by J. Kenji López Alt

Note:  The ricotta salata sold in the USA is not aged anywhere enough for the true flavor of this dish. Seek out an imported ricotta salata from Italy at a specialty market or combine equal parts sheep’s milk feta with grated Pecorino Romano cheese. 

INGREDIENTS

• Extra-virgin olive oil, for frying and more for drizzling
• 2-3 small Italian or Japanese eggplants, the skins roughly peeled, tops and bottoms trimmed, cut lengthwise into ½ inch thick slices
• Kosher salt
• 3 medium cloves of garlic, peeled and roughly crushed with the side of a large knife
• 1 (25 oz.) jar passata (tomato puree)
• 1 pound dry rigatoni or penne rigate
• A large handful of fresh basil leaves (for the sauce), as well as another handful of roughly torn large leaves for garnishing.
• Aged ricotta salata, finely grated

DIRECTIONS

1. Place eggplant slices in a large bowl and fill with cold water.  Add enough salt to the water and swirl with your hands so that the water tastes like the sea.  Allow the eggplant to soak in the salted water for half and hour.  This will both flavor the slices and allow the eggplant’s bitter flavors to drain out into the salted water.  Drain the slices and pat dry with paper towels.

2. Heat a thumb’s thickness of olive oil in a 12-inch non-stick or cast iron skillet over medium heat until shimmering.  Add as much eggplant as fits in a single layer without overlapping.  Cook until the eggplant is browned on both sides (but not dark brown or   burnt).  Transfer eggplant to a plate and set aside. Repeat with remaining eggplant, adding olive oil as necessary, until all eggplant is browned.

3. Heat remaining oil until it shimmers. Add garlic cloves to the oil and cook, until fragrant, but not browned.  Remove cloves from the oil and discard. 

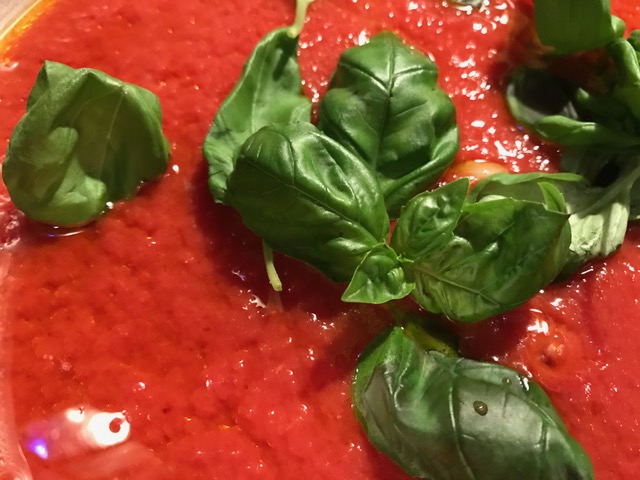
4. Add the tomato puree to the oil and cook, stirring constantly until evenly incorporated. Bring to a boil, and add a large handful of basil (stems and all) to cook into the sauce.

5. Reduce to a bare simmer and cook, stirring occasionally, until liquid is thickened into a sauce-like consistency, about 15 minutes. Season to taste with salt.  When no one is looking, add a tsp. of sugar to add sweetness, if necessary.  Remove the cooked basil from the sauce and discard.

6. Meanwhile, bring a large pot of salted water to a boil and cook the pasta according to the ‘al dente’ package directions. Drain pasta, reserving 1 cup of cooking liquid. Return pasta to the pot.

7. Add the sauce to pasta and toss to coat, adding reserved pasta water if necessary to thin sauce to desired consistency. Add eggplant slices and toss to combine.

8. Serve pasta immediately, drizzled with extra virgin olive oil and garnished with grated ricotta salata and a handful of torn basil leaves.   Serves 6

9. Think of Sicily.

Gwen Beinart's Teiglach • Charlene Beinart

Bretty Rawson

Note from Curator Rozanne Gold: What a lovely surprise to receive this beautiful story all the way from New Zealand.  Psychologist Charlene Beinart learned about “Handwritten Recipes” while listening to a podcast of “A Taste of the Past,” hosted by culinary historian Linda Pelaccio. The show, recorded in a hip studio at Roberta’s restaurant in Bushwick, Brooklyn, managed to tickle the tastebuds of a childhood in Durban (South Africa.)  How I love that connection! Teiglach (also spelled taiglach) is a sweet treat eaten on Jewish holidays, but most popular for Rosh Hashanah (the Jewish New Year).  This recipe is particularly fascinating to me because the teiglach of my youth were small balls of pastry boiled in honey and stuck together in pyramids with bits of candied fruit.  Gwen’s teiglach are, instead, large, oval rings of pastry afloat in amber syrup. Who needs to wait for a holiday?    

BY CHARLENE BEINART

My mom, Gwen Beinart (nee Sackstein), born in 1936, has always been the heartbeat of my love for baking. Over her lifetime she gathered a collection of recipes handwritten onto small cards — some her own, and others gathered from family and friends, tested, tasted, and kept as part of her core repertoire.

Of Lithuanian and German Jewish heritage, I am the second generation born in South Africa, and the youngest of three girls.  A typical Jewish immigrant history, my grandparents on both sides came to South Africa looking for a better life. They were very poor and my parents wanted nothing more than to give us the best possible life and education. My father was a self-made businessman and my mother was a very creative homemaker.

Of all of her recipes, there’s one that brings back the most vivid memories of delicious family time: Teiglach.  Syrupy, crunchy, chewy donut-shaped biscuits, these sweet offerings were at the centre of every gathering and a symbol of the importance of the occasion being celebrated.  This recipe was what my mother was best known for.  My emotional attachment to it was so profound that it took me more than 20 years after her death to make them. 

I am remembering, from my childhood in Durban, all the many conditions needed to make perfect teiglach.  First: the weather.  It must be a humid-less, sunny day, because the teiglach got dried out on my parents’ brick-paved patio before being boiled in syrup. Next: the equipment. You had to have the right pot, with a heavy metal lid and a brick placed on top to make it completely airtight. Then: no draughts! My sisters and I knew to never open the kitchen door and let in a draught when the teiglach were boiling on the stovetop!

I was always excited when my mom made them because it meant something important was happening!  Most likely, we were going to Johannesburg to be with my aunts, uncles, and cousins for Rosh Hashanah or Pesach.  Huge round Tupperware containers would be filled with my mom's teiglach and offered as gifts.  Everyone made a fuss: teiglach were considered a great delicacy.  Best of all, the containers were never returned empty — my aunts filled them to the brim with treats for our long car journey back to Durban.

After my mom passed away in 1991, we (my husband, three sons, and I) moved to New Zealand.  Naturally, my mother’s treasured box of handwritten recipe cards came with us.  But making teiglach felt far too daunting (emotionally and otherwise) to do on my own. Good results never seemed attainable. 

Just a few years ago, when my sister Kerry visited from London, we agreed to set aside a day to (finally!) make my mom’s teiglach. We had her Kenwood mixer, the right heavy-lidded pot, her lengthy handwritten recipe, and we felt her loving guidance — along with that of our other sister Elona, supporting us from England.

The family was well briefed: no opening the kitchen door, no draughts!    

Kerry and I put our memories together and got started.  Kerry remembered the teigel shape and we molded the dough before setting them out to dry in the sun. I remembered the three-step process to stir the teiglach once they were boiling in the pot: lift the lid, wipe off the condensation, and stir. Do this all quickly (remember, no draughts!) Of course this resulted in many hot syrup burns — scars I wear with pride!

While I always knew making teiglach was far more than following a recipe, I was not prepared for the overwhelming feeling I experienced when we opened the pot of the boiling treats for the first of six stirs.  The sweet, syrupy smell flooded me with lifelong memories of love, happiness, and of our beloved mom.    

Teiglach photo.jpeg

Mommy’s Teiglach (Gwen Beinart)
Note: Adjustments for gas stove made by Charlene

A Photo of Charlene's mother, Gwen Beinart

A Photo of Charlene's mother, Gwen Beinart

Ingredients:

6 eggs
1 Tablespoon Oil
1 Tablespoon Brandy
Pinch salt
2 teaspoons grated orange zest
½ teaspoon baking powder

Flour: 3 cups to start
Syrup: 2 lbs or 1 kilo tin golden syrup,
3 cups sugar, and 2 ½ cups water

Directions:

1. Slightly beat 6 eggs with oil, add brandy, salt, orange rind and then baking powder.

2. Add 3 cups flour sifted (one at a time).

3. Take a little bit on a small heap of flour and work in flour until dough is soft, slightly sticky but pliable. Roll into shapes in floured hands.

4. Put into floured tray to dry – preferably in sun for approximately 20 minutes, s turning over after 10 minutes

5. In the meantime, put syrup, sugar and water on to boil in large heavy pot (or weighted lid).

6. When boiling fast add teiglach. Close lid and boil on high for 5 mins

7. Then turn down to medium/high (low to medium on gas) to boil for 30-35 mins (26 – 30 on gas) before lifting lid. (Very important to weigh down the lid!)

8. Wipe lid and stir in quick motion every 5 mins until done (an additional approximately 20-30 minutes, or six stirs). Total time on the stove is 1 hour 10 mins according to Mommy but on gas probably a total of 55 mins)

9. Special note for gas : after 1st 5 min fast boil move pot to medium size plate on medium gas for 30 mins. Then do the lid/wipe/stir @ 5 min interval either 5 or 6 times in total.

10. When done take off 1 ½ cups of syrup for next batch

11. Then put in 1 heaped teaspoon ground ginger andhalf to ¾ cup boiling water down the side of the pot.

12. Stir until bubbling stops and take out teiglach onto damp board or plate. Leave to cool.

13. Can roll in chopped nuts if desired.

14. Store in plastic air tight container.

15. If making further batch add ½ used syrup and ½ new to same other ingredients – usually better

Black Ink Blot.png

Charlene Beinart works as a psychologist in private practice and her husband is a university lecturer. She writes, "Our sons have turned out to be far better cooks than me, and their interest in food history has captured my own. We are regular listeners of Linda Pelaccio's podcast, A Taste of the Past. Our oldest son is currently a MA student at Hebrew University, researching the lives and stories of Lithuanian Jewish immigrants to South Africa through the cookbooks they created and the recipes they passed down to their children."

Pumpkin Fritters • Jonathan Paul Katz

Bretty Rawson

A note from curator Rozanne Gold: Anna Freiman, native of Lithuania, speaker of nine languages, and devotee of Russian literature, herself sounds like an elegant character in a Dostoevsky novel. After surviving the horrors of the Holocaust, she joined her older brothers in South Africa, and later emigrated to Israel. Her grandson Jonathan, a writer (and creator of a Jewish historical cooking blog), found Annushka’s recipe for pumpkin fritters in a red binder his mother has kept for thirty years. With great affection he says, “As a teacher, my grandmother’s handwriting in both Latin and Hebrew scripts was crisp and exact; the fluidity of the cursive was unmistakably correct and undoubtedly all her own.” Jonathan, whose roots spread from South Africa, Israel, Chicago and New York, expresses his cooking “as deeply Jewish and totally unboxed” — just like his exceptional grandmother. You can enjoy more of his writing and extensive research at www.flavorsofdiaspora.com

BY JONATHAN PAUL KATZ

Every fall and winter, I see advertisements and signboards for pumpkin pie, pumpkin spice lattés, pumpkin doughnuts — but none for the pumpkin dessert of my childhood: Pumpkin fritters — a popular dish from my native South Africa. This recipe, lovingly written by my late grandmother Anna “Annushka” Freiman (née Smit), is at the heart of this story.

Annushka died in 1999, but her legacy lives on in the tales about her and in the recipes she left behind. In the 1980s, she typed out a cookbook for the family — including her famous dill soup, fish curry, and the meat stews she learned to make in South Africa. In addition, she blessed everyone dear to her with dozens of handwritten recipes. Those given to my mother on her visits to Annushka in Israel, were gathered in a treasured red binder — one that would forever sit alongside the typed recipe book. These tastes of my childhood became a priceless link to the life of an extraordinary woman.

My grandmother was born in Panevezys, Lithuania in 1917, in the famous yeshiva town known in Yiddish as Ponevezh. She was one of nine children in a well-off family who made their living as bottlers of Pilsner beer. Like many well-educated Lithuanian Jews, she grew up in a multilingual environment — High German, Hebrew, Lithuanian, and Russian were spoken at school, while Yiddish was spoken at home. And she learned English and Polish at some point along the way. Annushka survived the Holocaust in the Kaunas Ghetto and Bergen-Belsen, but tragically lost her first daughter, her first husband, and most of her siblings. After the war, she moved to South Africa, remarried and had three children, including my mother. In the mid-1960s, she moved to Israel and taught Hebrew.

Soon enough, Annushka became well-known for her prowess in the kitchen. The dishes she made were hardly traditional — she had a love for Middle Eastern cuisine and the Afrikaner and Indian specialties she learned in South Africa. Other recipes harkened back to her roots: Gefilte fish — peppery, in the Lithuanian tradition — or her aromatic dill soup.

She brought many recipes from Lithuania, but mostly enjoyed the black rye bread and farmer’s cheese that were the mainstays of the Lithuanian Jewish diet for centuries. I am certain that the tastes of her childhood carried over into her cooking — hence her pumpkin fritters are less sweet than many of their counterparts among other South African communities. They are also far more elegant — befitting a literary woman who could read, write, and speak nine languages and was known for her elegant demeanor. (As a young woman, she was also known as “Annushka di Sheine,” Annushka the Beautiful, for her elegance and beauty.).

My grandmother spoke in allusions with frequent references to Dostoyevsky. Ten hours of her mellifluous words are available at the Yale University Library as proof. Her descriptions of the detritus of everyday life recalled the great works of Yiddish and Russian literature, imbued with a folk wisdom all her own. But her recipes begged for a bit of wisdom of one’s own — be it the dollop of sour cream to add to the dill soup, or ingredients, or measurements, which had been omitted or simply “forgotten.”

My grandmother died when I was a child, but I distinctly remember making her pumpkin fritters with my mother in our family’s cramped New York City kitchen. (I “helped” by putting things into the bowl). My mother was always looking at the recipe on the counter as she mixed the batter, and the smoke from the cooking oil filled the apartment with a sweetly burnished smell that I still associate with autumn. On one very rainy day, I remember how the smoke looked like an extension of the cloud outside the window.

When I was 20, I spent a few months in South Africa doing archival research in winter which, in South Africa, takes place June through August. While there, I had the chance to eat pampoenkoekies – Afrikaner-style pumpkin fritters — at a coffee shop in the Cape Town neighborhood of Rondebosch. And though they did not taste exactly the same as the dish of my youth — they were a good deal sweeter, with a touch of clove — the bite pulled me into a Proustian reverie.

Poignantly, I, too, have just discovered that Annushka had “forgotten” an ingredient — and I struggled to make the recipe as written, watching the fritters disintegrate before my eyes. My mother advised that my grandmother always included flour in the mixture, but alas, there was none in the recipe. I marveled to find this omission and Annushka immediately came to life. (Handwriting is so often indicative of what is not written.) And as I slowly stirred the flour into the bowl, I felt a small nudge, and heard her whisper “Enjoy in good health.”

The recipe, as written in Annushka’s teacher’s hand, with my additions in parentheses.

Pumpkin Fritters • Your loving “Sheine”

Ingredients:

2 pounds raw pumpkin
[1-1/2 cups sifted flour]
3 eggs
1 heaped tablespoon sugar
½ level teaspoon salt
1 teaspoon vanilla essence [author note: vanilla extract]
1 level teaspoon cinnamon
2 [level teaspoons] baking powder

Directions:

Peel and slice pumpkin. Cook slowly in very little water till soft (about 20 minutes). Strain off water and mash up very well into a pulp. Cool it completely.

When cool, add slightly beaten eggs (just with a fork) and then add the balance of the ingredients, but the baking powder is added last.

Drop tablespoonful[s] into shallow oil (not too hot, as they burn quickly). Fry till golden brown on both sides. Makes 40-50 fritters.

Note: The fritters make a delicious dessert and can be served with cinnamon and sugar. They keep well in the fridge for quite a few days – if not eaten up immediately.
Bete’avon ulabri’ut! [Bon appétit and to your health!]

Gramm's Banana Bread • Safiya Oni Brown

Bretty Rawson

bananabread1.jpg

A Note from Curator Rozanne Gold: Allison Radecki first met Safiya Oni Brown during a baby-wearing workshop for new moms with wriggly infants in their arms. Allison, with her newborn Tabitha, sat in a circle while Safiya, a holistic health counselor and child whisperer, demonstrated how baby-wearing could calm even the crankiest kid into a happy state. Years later, their paths crossed over a  kombucha drink that Safiya had prepared, and Allison asked for a healthy recipe for the New Year. Gramms’ banana bread was reborn.  Her original is here (prepared and photographed by me), along with Safiya’s update.  I love the verve of Safiya’s powerful penmanship, and of the story told.

BY SAFIYA ONI BROWN

This recipe was given to me by my Gramms, Cecilia Sylvester Jett, who, after my husband, was my favorite person in the world.  Gramms, my mother’s mother, was an amazing cook.  But after becoming a vegetarian, she focused more on health and less on aesthetics, and in later years was known for her nut and celery loaf (a holiday favorite), and her famous banana bread.

Gramms was born in Detroit and enjoyed clipping recipes from the Sunday Detroit Free Press. Because we are a family of foodies, she often invited me to her room to explore a recipe she found in the paper.  I remember going through the Betty Crocker Children’s Cook Book, from which I made every recipe that did not involve meat.

My parents became fascinated with health and nutrition after visiting a Seventh-day Adventist Church in the early 1970s. They switched their diets almost immediately, and when they returned to Michigan, my Mom was glowing with all the knowledge she had accumulated.  It made sense to both of my uncles who were in the medical field, and they became vegetarians, too.

Gramms was beautiful. She carried herself with authority and lent a helping hand to many people, whether they were renters at her different properties or just folks in her neighborhood.  She was a social worker while raising her seven children. She cherished everything involving her grandchildren. Until I was ten, she gathered all thirteen of us to enjoy at least a week together as a family, going on trips and spending holidays at her house.  

For decades, I kept her recipe for banana bread on top of my fridge, hidden, so that it didn’t get lost. The original recipe, from the Detroit Free Press, is scribbled in my own writing.  I took it down during a phone call to Gramms before one of the many dinner parties I loved to throw in high school and college.  

This banana bread was the spark-plug for a small business idea that generated extra money after college. I also used her recipe as a base for zucchini-and-carrot spice bread that became a great seller as part of a line of all natural, organic sweet breads. I sold them to juice bars, cafes, and all-natural eateries. Eventually I gave this up because it was lots of work and barely profitable, but it was fun, and certainly a wonderful connection to my grandmother.  It spurred me to study at the Institute for Integrative Nutrition.  

In addition to the intoxicating perfume of the wonderful banana bread that would waft from her kitchen, I am reminded of another favorite fragrance as I write this: that of sun-warmed tomatoes, straight from her garden.  We would eat them sliced in sandwiches, lightly salted and peppered, with a farm-fresh egg on Ezekiel bread. No doubt, these vivid memories informed my career choice later on — linking food and well-being.  

Gramms died when my son, who is now 8, was just six months old. She was on her deathbed when I got a frantic call from my mom.  She feared Gramms would die before I could see her. That night we drove nine and a half hours to Detroit to share her last moments.  As I gently performed reiki on her frail body, I could feel all of the hurt and gnarled memories evaporate.  She died in peace seven minutes later.

I now make Gramms’ banana bread during winter holidays but also whenever I want to bring an edible gift somewhere.  The reaction is the same every time: “OMG this is so good, can I please have the recipe?”  

Here it is. And, Happy New Year. 

bananabreadrecipe.jpg

Safiya’s Banana Bread

Ingredients:

½ cup whole wheat flour or spelt flour
½ cup flax meal
½ cup oat bran
1 teaspoon baking soda
¾ teaspoon fine sea salt
½ cup organic butter (at room temperature)
8 tablespoons date sugar
1 egg
1-¼ cup mashed bananas
¼ cup organic yogurt
8 tablespoons date sugar

Directions:

Preheat oven to 350 degrees. 

In one bowl, mix all the dry ingredients together first five ingredients.  In another bowl blend together the butter, date sugar, and egg.  Mash bananas, measure yogurt and set aside.  Alternate mixing the creamed sugar mixture, mashed bananas, and the yogurt into the flour mixture until the batter is incorporated. Pour mixture into an ungreased 9 x 5 x 3 in. loaf pan. Bake 50 to 60 minutes.  For muffins, bake 30 minutes.  

Suggestions: Add 1 cup of crushed walnuts. When bananas become too bruised, throw them in the freezer for your next batch of banana bread.  

Safiya Oni Brown is a Quantum Healer, Whole Food Family Counselor, Child Whisperer, Universal Life Minister, Baby-Wearing Aficionado, Fermentation Expert, Holistic Health Counselor and the Co-Owner of Quantum Kombucha & Dr. Brown’s Healing Water. She specializes in stress reduction, illness recovery, and natural family rearing through whole food preparation, fermentation, and Quantum healing.  For more information on Safiya visit www.radiantalchemy.org  

Krautsalat (Cabbage Slaw) • Sonya Gropman

Bretty Rawson

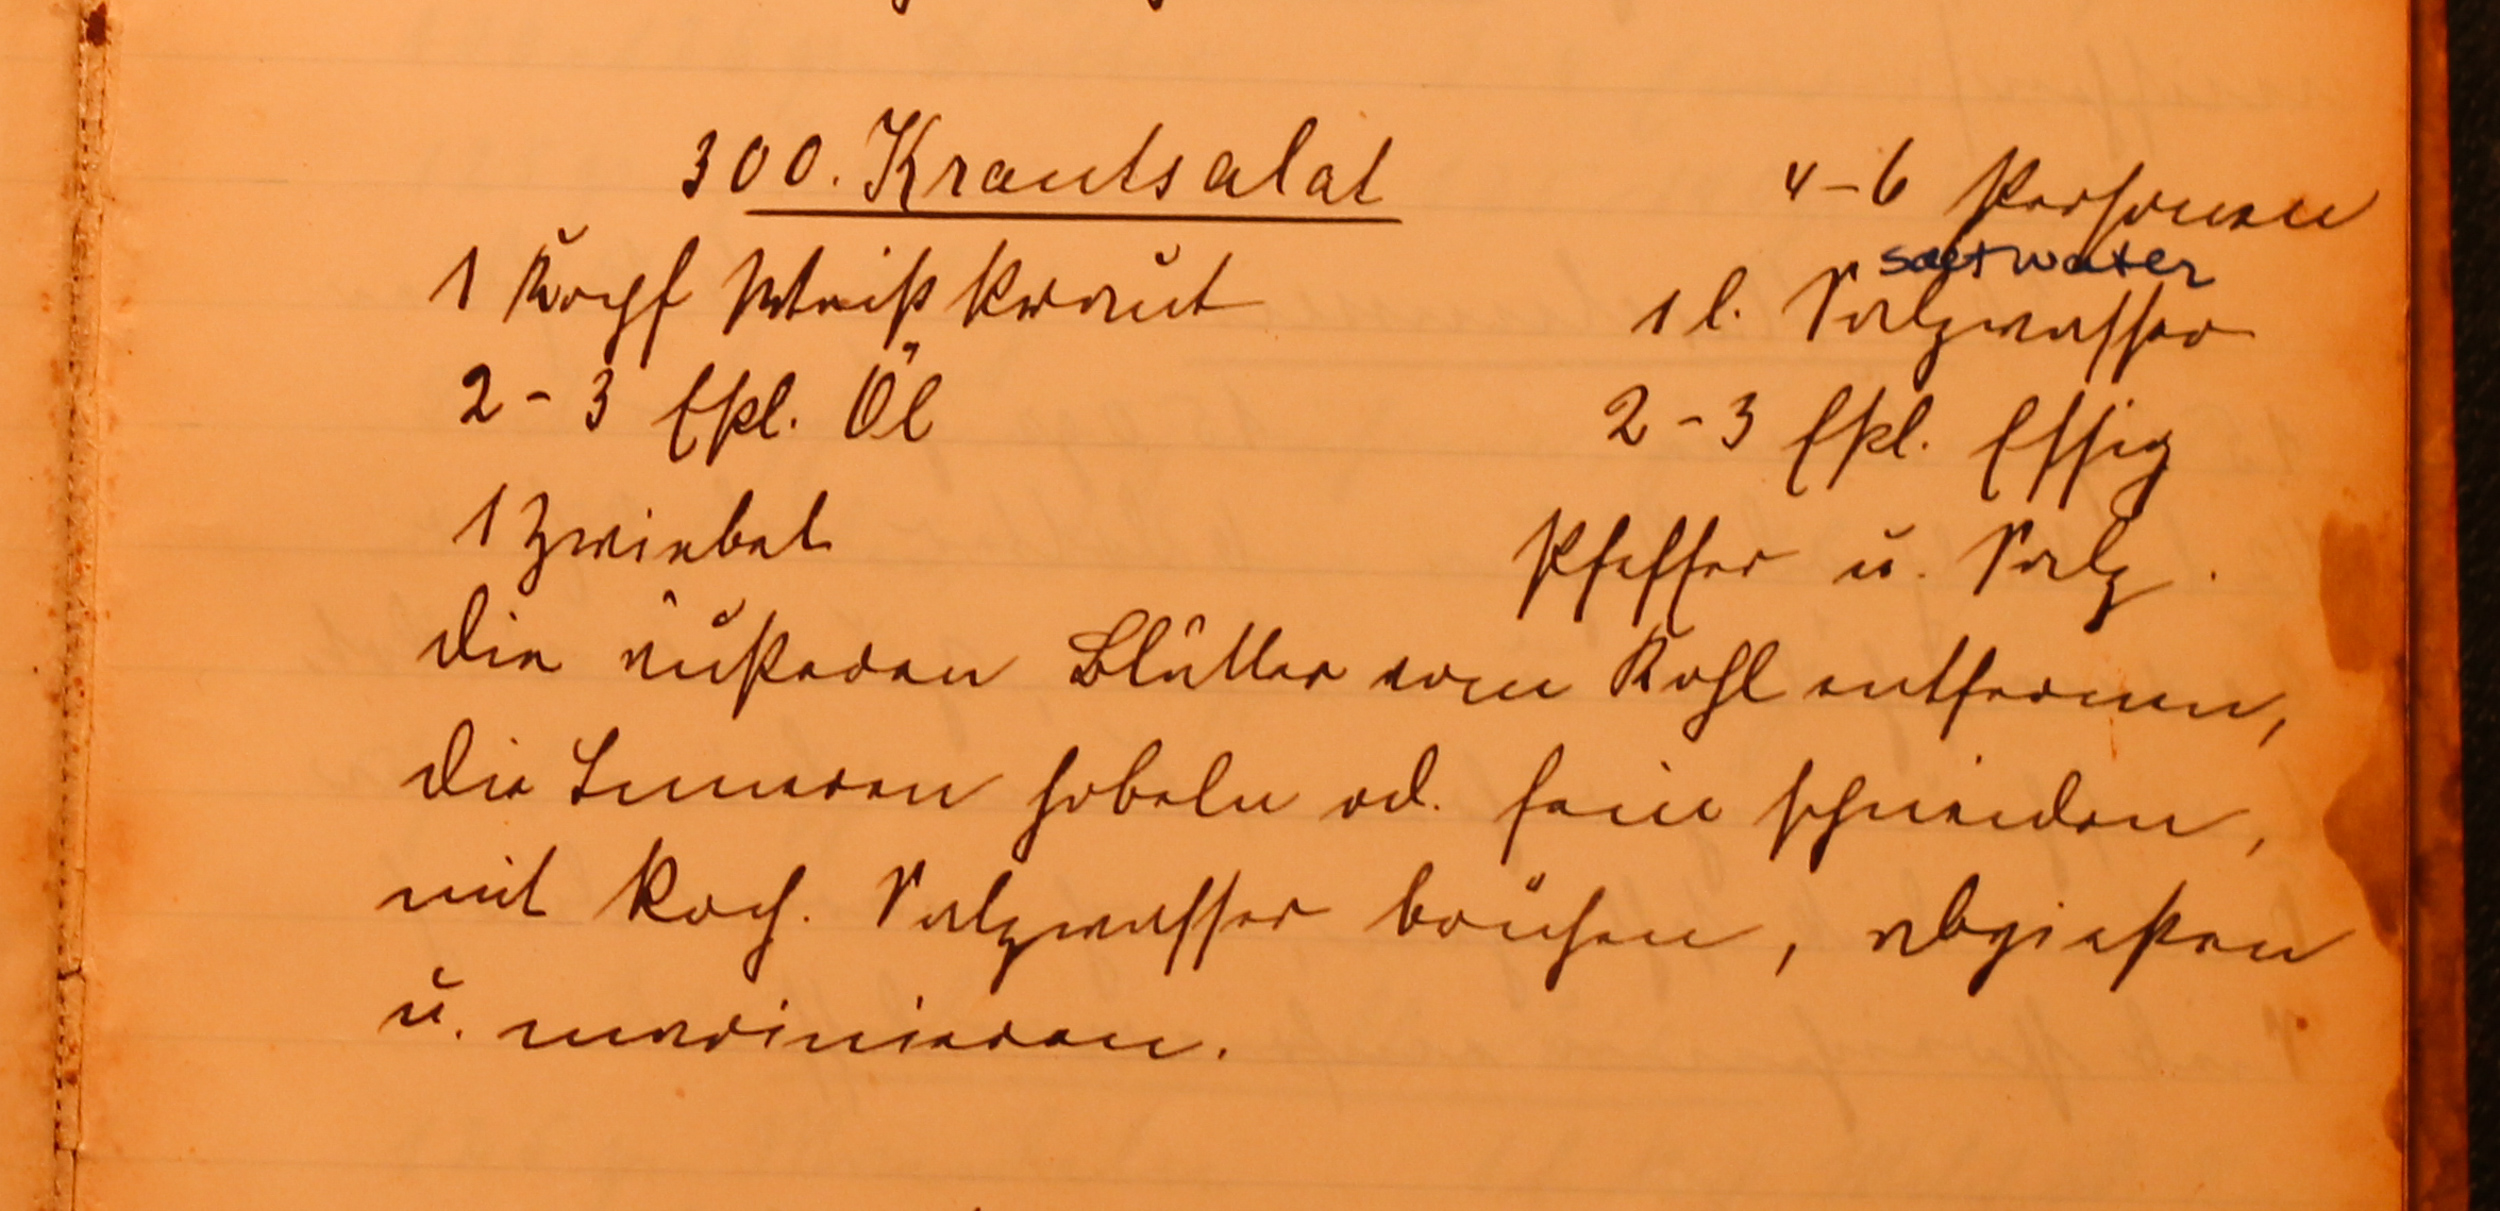
Note from curator Rozanne Gold:  We are delighted to have this beloved recipe for Emma Marx’s cabbage slaw, translated and submitted by her great granddaughter, Sonya Gropman. It is but one of more than 100 recipes to be published next year in “The German-Jewish Cookbook: Recipes and History of a Cuisine,” co-written by Sonya and her mother, Gabrielle Rossmer Gropman (University Press of New England). The gorgeous narrative, spanning the kitchens of four generations, is part of the HBI Series on Jewish Women (the Hadassah-Brandeis Institute.)  I especially love the photo of Emma’s old-fashioned wooden mandolin that was used to shred cabbage, cucumbers, and onions.  And you will no doubt enjoy preparing the dish, faithfully, just as much as I did. We look forward to the book’s publication in September 2017. 

Krautsalat (Cabbage Slaw) by Sonya Gropman

My mother grew up in a household where three adults cooked on a regular basis her mother, grandmother, and father (her grandfather, who also lived with them, didn’t cook). The family had fled Nazi Germany in 1939, when my mother was a one-year old baby and settled in Washington Heights, a neighborhood in upper Manhattan that was home to approximately 20,000 German-Jews. German was frequently heard spoken by people on the street and there were many businesses that catered to the community, including food shops. Thus, it was easy for people to continue eating the same foods they had eaten in Germany.

Many German-Jewish families arrived in the U.S. with a household worth of personal belongings. Unlike most other refugees who might arrive with just a single bag or suitcase after fleeing their homeland German-Jews often brought the entire contents of their homes, which had been packed into enormous wooden crates called a lift van. This box of possessions included all the usual items that fill a household, both big and small from furniture, to clothing, to cookware, and everything in between.  That this happened was due to a perverse policy of the Nazis. It was a way for them to collect taxes on everything Jews packed, and it also demonstrated their imminent departure from Germany.

Much of the cookware and dishes brought by our family, which dates from the early 1900s to the 1930s, survives and is still in use by both me in my kitchen, and by my mother in hers. There are family objects that I use on a daily basis, including knives, a colander, and sauce pans.  It is a testament to how well-made these objects are and still functional many decades later.     

My mother has a wooden mandolin that belonged to her grandmother, Emma. By today’s standards, it seems very basic as it lacks folding legs to prop up the blade (instead it must be held at an angle with one’s hand), and is has a fixed blade, so that the thickness of the slices is not adjustable. To our knowledge, the blade has never been sharpened, yet it remains quite sharp. My mother uses it regularly to slice vegetables such as cucumbers and onions. She also uses it to shred green cabbage in order to make Green Cabbage Slaw, or Krautsalat, a dish that her grandmother frequently made for holiday meals during her childhood.  It accompanied any number of meat meals, such as roast duck or goose, tongue, or veal roast. It was a favorite dish of my mother’s and she was thrilled to find the recipe in a cookbook her grandmother had handwritten when she attended cooking school in Germany before she was married in the early 1900s. My mother set about making the recipe, but the finished dish didn’t quite match her memory of how it tasted during her childhood. She tinkered with the recipe, comparing the list of ingredients and the written instructions with her memory of it. She realized that even though the written recipe included onion, Emma had not used it in her version. Eventually she came up with a recipe for the dish that tasted exactly the way she remembered it. 

When I first saw the recipe, I was struck by my great-grandmother’s beautiful, fluid script, written in a form of Old German that is very difficult to read. I then noticed a translation for “salt water” written in blue ink, jotted down by a frustrated translator (my mom), who was relieved to figure out the word. At first I was sorry to see the page marred by contemporary writing, but I later realized that it adds another layer to the history of the recipe, keeping it alive and in the present. 

This recipe is remarkable in that a short list of ingredients is transformed, seemingly through a bit of alchemy, into something so addictively delicious. Falling somewhere between coleslaw and sauerkraut, it uses boiling salt water to break down the shredded cabbage into a slightly wilted and softened state.  A light vinaigrette dresses the cabbage, while brightening its taste with the acidity of vinegar.


Cabbage Slaw (Krautsalat)

8-10 servings

This dish is best if the cabbage is finely shredded. If you do not have a mandolin, use the long blade on a box grater, the slicer attachment on a food processor, or a sharp knife to slice the cabbage as thinly as possible. This recipe is the original version, but feel free to try the variation we discovered below which uses a few non-traditional additions.

1 medium sized head of green cabbage
1 quart of water
2 tablespoons of salt + extra if needed
4 tablespoons white wine vinegar
ground white, or black pepper, to taste
2 tablespoons neutral oil, such as canola or safflower

Prepare the cabbage:

Shred the cabbage into a large glass, ceramic, or stainless steel bowl. Boil the water with the salt. Pour the boiling saltwater over the shredded cabbage. Let it sit until the water is cool, between 30 minutes to 1 hour. Pour the cabbage into a colander set in the sink to drain the water. Press down with a plate that is slightly smaller than the colander to press out as much water as possible. Put the shredded cabbage in a serving bowl. 

Make the Vinaigrette: 

Pour the vinegar and pepper into a small bowl. Slowly add the oil, while whisking, until blended. Pour the vinaigrette over the cabbage, tossing to coat evenly. Taste for salt, adding more if needed. 

Serve:

The slaw will be ready to eat immediately, though the taste and texture will mellow and improve if allowed to stand for an hour or more. Serve chilled, or at room temperature.

Variation: Prepare cabbage as in step #1 above, adding some or all of the following ingredients to the drained cabbage in the bowl: 

2 carrots, shredded on large holes of a box grater
1 small shallot, minced
1 bunch arugula, finely chopped
1-2 tablespoons minced fresh herbs, such as marjoram, parsley, or thyme  
Continue with steps #2 and #3

© 2016 Gabrielle Rossmer Gropman & Sonya Gropman The German-Jewish Cookbook: Recipes and History of a Cuisine

*HBI is the Hadassah-Brandeis Institute, an academic center at Brandeis University which promotes scholarly research, artistic projects and public engagement.   


Stuffed Cabbage, Hungarian-Style • Jolie Mansky

Bretty Rawson

Note from curator Rozanne Gold:  Jolie Mansky’s memories of her grandmother’s stuffed cabbage are mouthwatering.  The same can be said of the recipe I enjoyed making so much knowing I would serve it sometime during this year’s Rosh Hashanah holiday (year 5777), and well into the wintery months. Appropriately seasoned with sweetness (apples, raisins, honey, brown sugar and onions) and quite in contrast to the sauerkraut-y flavors of my own Hungarian mother’s version, its dulcet notes are perfectly in tune.  Jolie, an ebullient New Yorker, is the proprietor of Urban Concierge U.S., a company that enables others to “fulfill a desire or a dream from the perfect meal or sold-out event ticket, to a unique getaway day trip or global vacation.” I would say she should add sharing treasured recipes to that list and I encourage her to turn her family memoir First, You Brown the Onions, into a cookbook for a wider audience. Thanks, too, to Allison Radecki for her editing prowess.  

Stuffed Cabbage, Hungarian-style by Jolie Mansky

I have many memories of cabbage — from my Mom’s cabbage soup to the stuffed leaves featured here.  But it is this recipe, unbelievably delicious, schmaltzy, tasting both sweet and tart, that brings back incredible memories of childhood: Family gatherings, holidays, the powerful aroma of onions and tomatoes slowly cooking, that first taste of sweet-and-sour flavors, and being at my grandparents’ home joined by many cousins.   

All the women in my family (great-grandmother, maternal grandmother, great aunts, mother, and aunts) made this dish for the holidays.  It particularly links me to the three generations of women that came before me: my mother, Sherry Stauber Roberts, my grandmother, Lillian Adler Stauber, and Mechlya Popovitz Adler-Weiss, my great grandmother.

Sherry was born at home in Brooklyn; Lillian in 1905 in Viseu de Sus, Romania (or Hungary, depending on who you ask and who was in power); Mechlya was born in Hungary-Romania in 1883.  

Mechlya was a midwife and became a professional caterer in the U.S.  I don’t know that she loved to do anything.  She was just constantly busy doing what she had to do.

Lilly was an amazing balaboosta (the Yiddish term for the perfect housewife and someone who provides sustenance to the family); she cooked, she cleaned, she hosted.  Besides having and maintaining a beautiful home, Lilly also loved to play cards.

Sherry, my mother, is also a fantastic balaboosta.  At age 90, a retired buyer, she now loves to read, knit, play Lexulous online, watch HGTV (Bobby Flay and Cook or Con) and follow everyone on Facebook. My mother has written this recipe out for me for over thirty years.  Not surprisingly, the recipe changes a bit each time.  

When I compiled a family memoir called First, You Brown the Onions, I made sure to include a copy of this dish within its pages.  I also have several copies of my mother’s handwritten “originals.”       

I have always been fascinated how different cultures make similar dishes with what is available.  I love stuffed grape leaves.  The Iranian version, cooked in a pomegranate reduction, is divine.  Then, there is the Levant, where every conceivable vegetable is stuffed, zucchini, peppers, tomatoes, and even onions.

My earliest recollections of my grandparents’ home involve food and ritual.  I remember my grandfather, Izzie, getting up at the crack of dawn and faithfully laining his tefillin, putting on the black leather boxes which contain Hebrew parchment scrolls.  He would mumble his prayers rapidly and say “shah” if anyone interrupted.  

My grandmother, Lilly, was always cooking, even after a stroke rendered her partially paralyzed at age 58.  She had to cut the vegetables perfectly even then.  Lilly had set menus for every night of the week, which must have made life easier. Everything she made was delicious.

To this day, I can still lovingly detect a Jewish-Romanian accent.  When I hear this accent, and see the sparkling gold teeth of immigrants, I close my eyes and remember the love I felt as a child. 

STUFFED CABBAGE (Hungarian Style)

SOFTEN CABBAGE LEAVES (can be done in one of two ways):

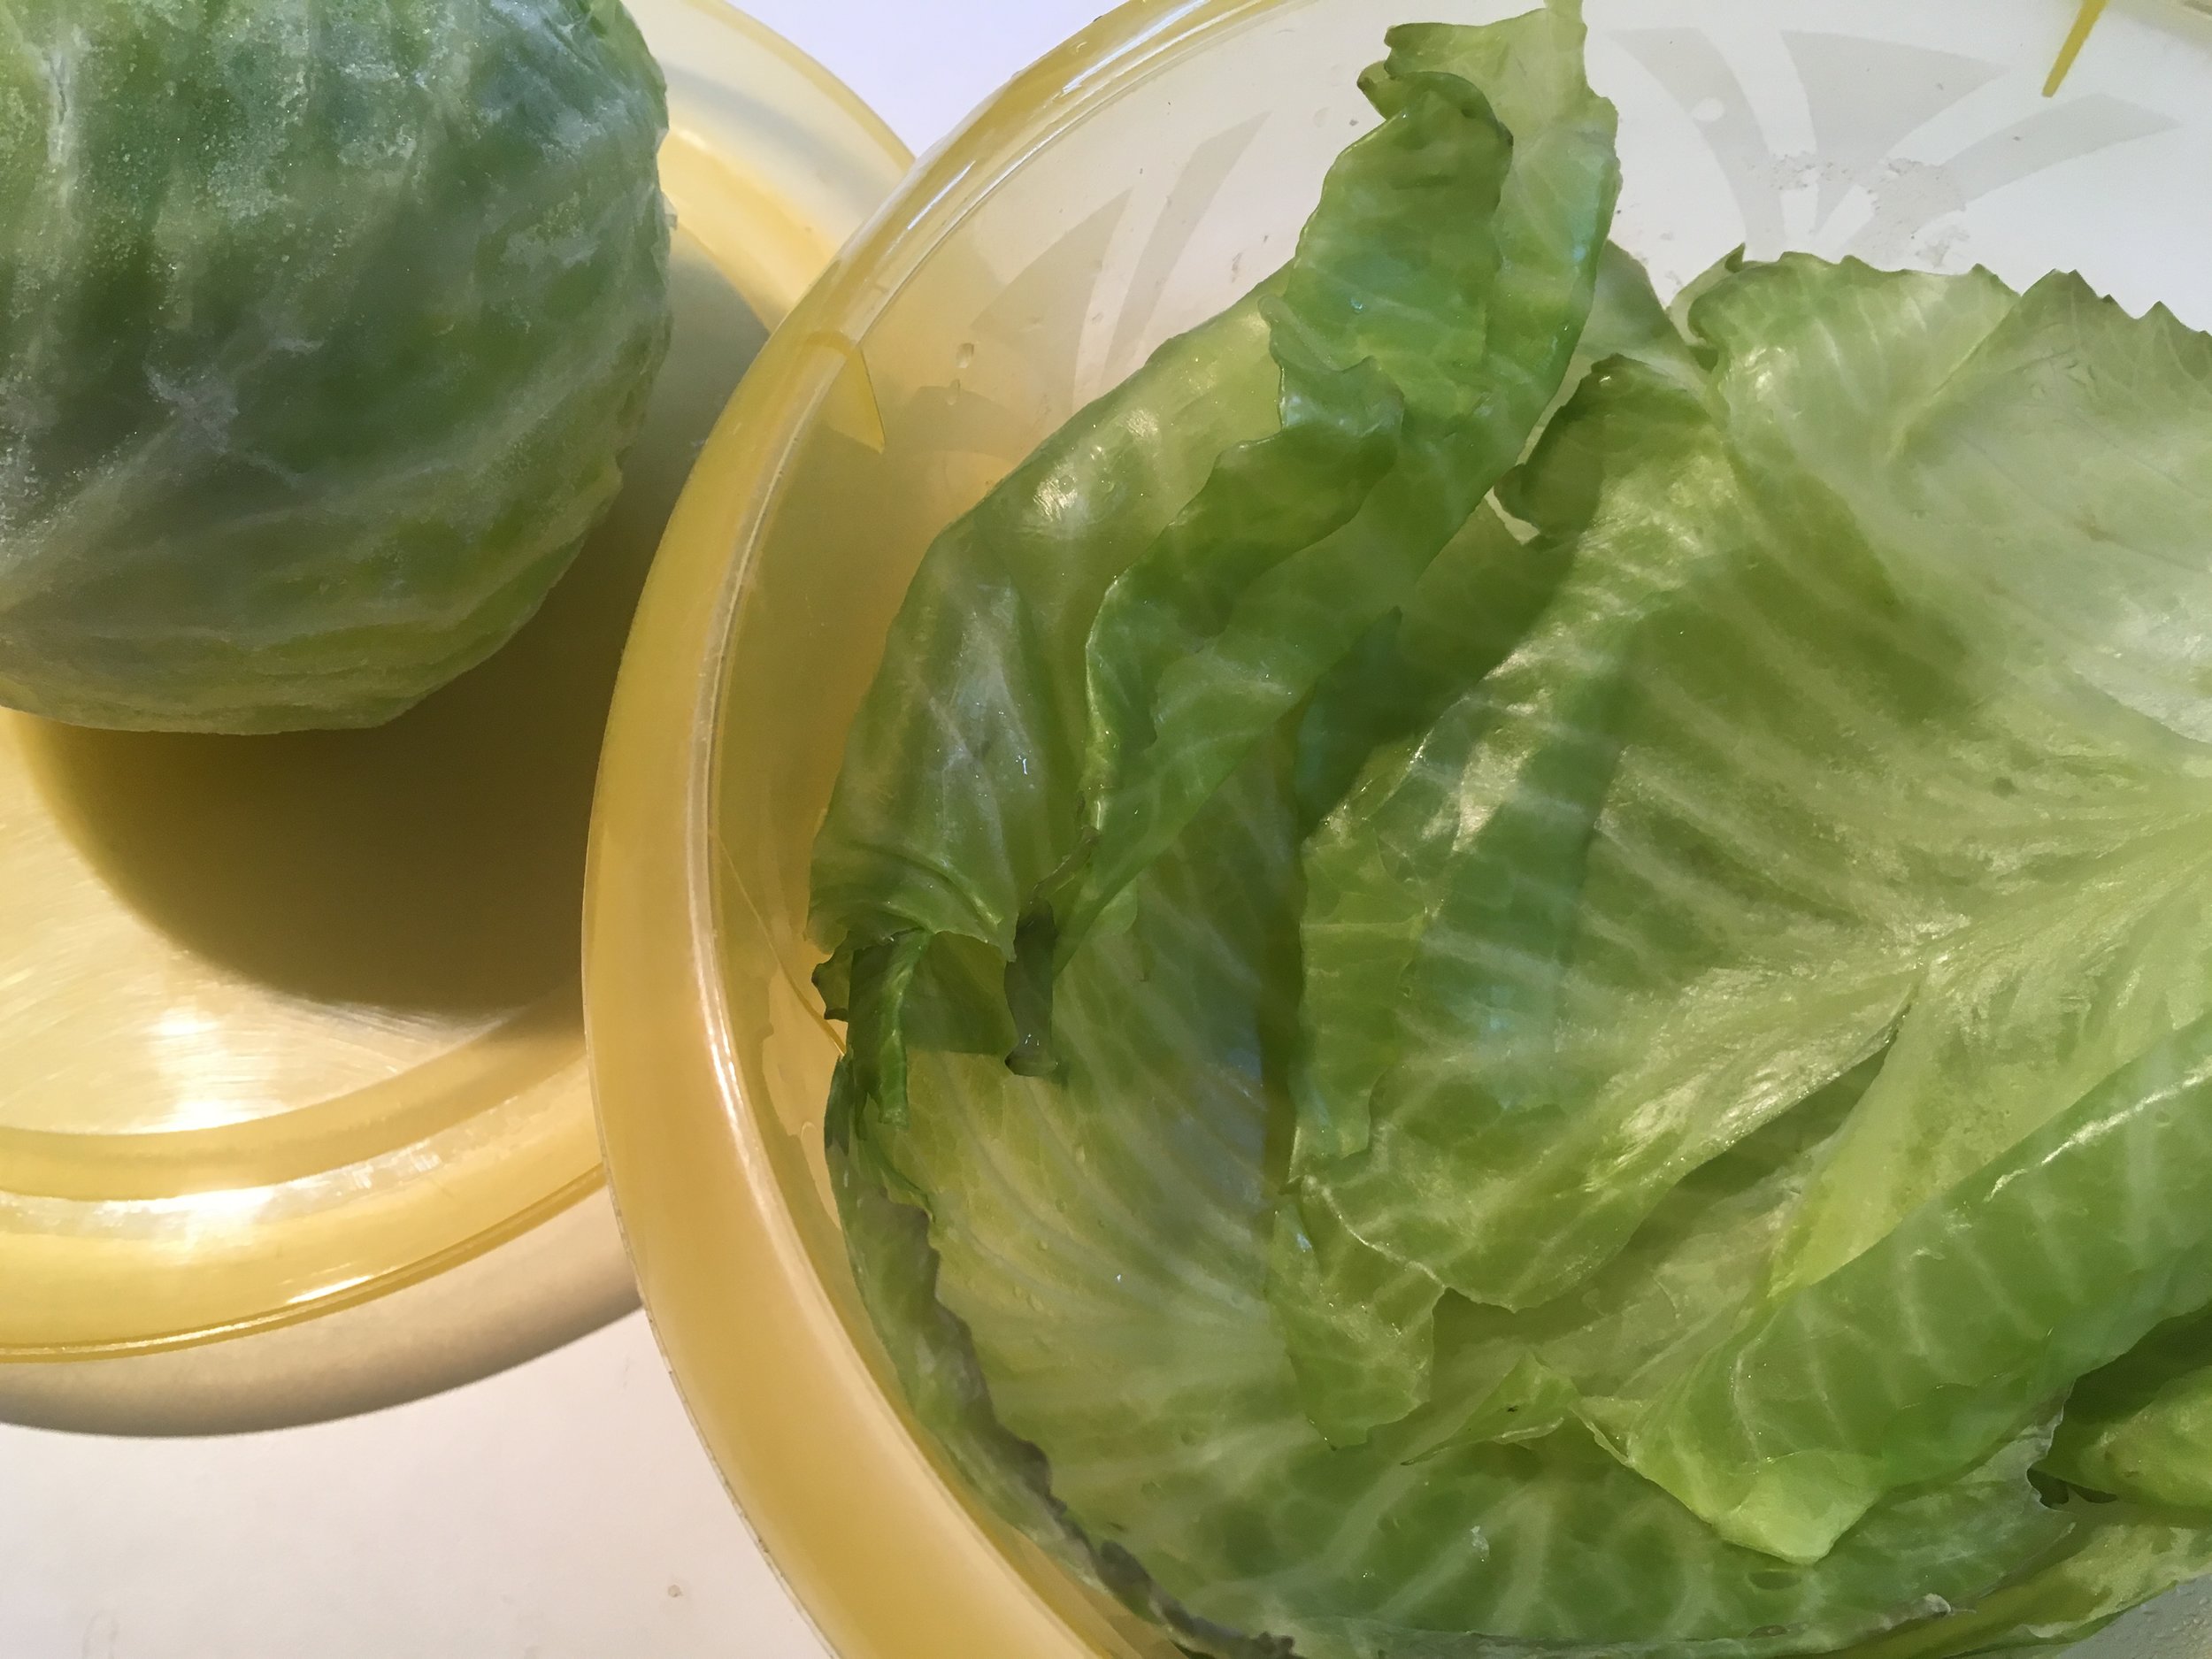
1. Cut out, core and wash cabbage. Cover in plastic wrap and place in freezer overnight.  When thawed, leaves are soft and ready to take off.  –OR- 
2. Cut out core and place cabbage in large pot of boiling water.  Steam until soft enough to remove leaves.  You may have to put it in boiling water a few times.

SAUCE:  In bottom of large pot:

Shred cabbage (all leaves not used for filling)
2 Onions, chopped
1 large can crushed tomatoes
1 small can tomato paste
1-2 sliced apples
1/2 cup raisins
1/2 cup brown sugar & 3 Tbsp. sugar
Juice of 1 lemon
(Adjust seasoning during cooking)
Salt & pepper
2 Tbsp. honey
2 cups water - watch if more needed

FILLING:

1 1/2 lbs. ground beef
Salt & pepper
Bread crumbs (or Matzo meal)
3 Tbsp. of prepared sauce
1 grated onion
1/2 cup raw rice (rinsed)

COOKING:

  1. Place cabbage rolls - rolled with 2 ends tucked in (they hold closed) on top of sauce.
  2. Simmer to a slow boil.  Cover and cook about 2 hours.
  3. During cooking, watch to make sure that the rolls are not sticking to the bottom of the pot. Gently shake pot to keep rolls from sticking.
  4. I separate the prepared sauce into two parts and pour the last half over the cabbage rolls.
  5. When cooled, place the cooked rolls in a baking pan, in rows.  Dribble a little honey over the cabbage rolls and brown before serving. 

Beatrice Nisenson’s Prune Cake • Evan Nisenson

Bretty Rawson

"I noticed there were additional comments made in red, and a wine jelly stain, somewhat faded in the upper right-hand page corner, which came from a syrup that was poured over the cake. I also found a typed version that had been altered slightly, most likely by my grandmother, evolving with the taste buds of time."

Read More

Pizza da Vovó (Grandma’s Pizza) • Ligia Mostazo

Bretty Rawson

Note from Curator Rozanne Gold:  I met Brazilian journalist Ligia Mostazo one evening at the New School where I was guest lecturer during Stacey Harwood-Lehman’s “Food Narrative” class.  Ligia is a currently a student, honing her prowess as an essayist and food writer.  I was quite happy that she wanted to share a part of her history, but was even more impressed that in addition to perfecting her storytelling skills, she tested her recipe several times before sending it to us.  I know from personal experience how challenging it can be to make pizza dough in a home oven!  Many, many thanks to Ligia. 

Note from Ligia:  I am journalist. Although I have worked in hard news, I prefer texts that are more enduring. That’s why I became a screenwriter and editor of documentaries.  In the Summer of 2014 I moved from São Paulo, Brazil, to live in New York, where my journalist husband is working as an international correspondent for a Brazilian Broadcast news service.  We have two sons: João is 24 and is a graduate student in Literature. Thiago, who’s 22, lived for one year in New York with us, and went back to Brazil, where he’s an undergraduate student in journalism (one more!). They both now live together in São Paulo.  I always loved to cook and as I have to cook almost every day here in New York, I decided to explore new flavors, ingredients and recipes. Surfing the internet, I found the Food Narratives classes at The New School, where I was introduced to this lovely “Handwritten” project.

Pizza da Vovó by Ligia Mostazo

This pizza recipe is considered one of my family’s treasures. The tradition to bake began with my great grandfather, Manoel Mostazo, who moved to Brazil in the early 1900s from Periana, a small city in the south of Spain.  He left his hometown after an earthquake devastated the city and his family. Manoel was a young man with an entrepreneurial spirit and soon started his own business, a bakery. 

This bakery was the first in Santo Andre, a city nearby São Paulo where my family grew up, and became a business passed down from generation to generation. My great-grandfather learned to make pizza, cookies, and many varieties of bread from the best bakers he knew. He taught my grandfather, Antonio, who taught my father, Walter, from whom I inherited the love and respect for all things that grow with yeast and turn into food in the oven.

My father owned his own bakery, but it did not survive the Brazilian economic crisis in the 1970s. With three kids to raise, my mother, Elza, had the brilliant idea to sell homemade pizza dough, their bakery’s signature dish. The first clients were friends and family who already knew the delicious pizzas from the Saturday dinners in our house. Local rotisseries and restaurants became clients as well. We adapted our garage to house a professional oven, a big table, and other tools. My siblings and I helped my parents attend to clients. We usually had to make more than 500 pizza discs per week.
 
For more than fifteen years this was our job. Working together, we were able to afford the bills and keep the legacy of our family alive. Eventually, my siblings and I went different ways.  None of us became bakers. But pizza is still a great reason to gather the family around the table. 

Our favorite toppings continue to be mozzarella, simple and delicious; smoked sausage and onions; caned tuna, corn and onions. All of these sit upon a layer of fresh tomatoe and are finished with oregano and olive oil as soon as they come out of the oven.

In the early 2000s, when my father was teaching my sons how to make the best pizza dough, we decided to write the recipe down. In honor of my mother, we called the recipe Pizza da Vovó, which means, Grandma’s Pizza. I think this moment was the first time the recipe was written down! Although we now have the recipe, we never made pizza without my parents around. 

I had my first experience baking pizza alone in New York, far from my parents, far from home, and far from my country. I did it to take the pictures that you see here. My first attempt was frustrating. The dough was too soft. I called my father, who did not answer the phone. I didn’t have much time because the yeast was working fast. I was nervous. It was my sister-in-law who saved me with a simple piece of advice. “Follow your instinct,” she said, “add flour and try to remember how you felt the dough in your hands when you used to make it with your parents.”  

I recovered my self-confidence, but it did not work very well. After baking, the dough was too harsh. When I finally got to talk to my father he said the same: “follow your feelings and add the flour slowly, you will know when it is good.” 

The second time, the recipe worked and I could make the recipe adjustments needed to give you the correct quantities. Now that this recipe has been tested and approved, it can go on to nourish future generations.


Grandma’s Pizza

(translated from Portuguese by the author)

1-kilo (2.2 lbs) all-purpose flour
100 grams fresh yeast
200 ml vegetable oil
1 Tablespoon sugar
1 Tablespoon salt
500 ml water

Step 1. Crumble the fresh yeast in a big bowl and add sugar. Wait until the yeast dissolves and then add water, salt and oil. Mix the ingredients well and add the flour little by little.  Mix until the dough is smooth and unglued from the bowl

Step 2. Sprinkle a work surface with flour. Reshape the dough into seven balls of the same size and put them on a lightly floured surface. Cover the dough and let it rest about 30 minutes. Meanwhile, put six to eight (it depends on the size) ripe tomatoes in a blender, process quickly and rest in the refrigerator. 

Step 3. Heat the oven to 400 degrees. Press one dough ball at a time on the work surface with your hands, adding flour as needed to roll the dough until it is as thin as you want.** Fold the flat dough in a half and transfer to the baking sheet.  Unfold the dough and press down around the edges. Transfer the processed tomatoes into a colander with a plate underneath so it does not retain water. Sprinkle salt to taste, mix and spread a thin layer of tomato over the dough. Bake for about 5 minutes. The idea is to make a pre-baked dough.  It will be ready when the lower part is baked and light in color. The pre-baked dough can be used immediately, refrigerated for a week, or frozen for up to six months.

Step 4. Heat the oven to 350-400 degrees. Spread your favorite pizza toppings on the pre-baked dough and bake for an additional 10 minutes. 

** If you want to make mini-pizzas, divide the ball into four parts and open each of them by hand doing a small edge. Then follow the same steps listed above.


My Babcia’s Mizeria (Polish Cucumber Salad) • Allison Radecki

Bretty Rawson

FullSizeRender (47).jpg

Note from curator Rozanne Gold: I’ve been reading a lot about cucumbers recently and so was delighted to get this wonderful recipe and memory jolt from food writer and cohort, Allison Radecki. The recipe is from her beloved Polish grandmother, her Babcia (pronounced BOB-cha), and it comes with a detailed history of a vanquished, but riveting, way of life.  The handwriting belongs to Allison and the recipe has been handed down from at least three generations.  Allison’s daughter, Tabitha, will no doubt be the fourth.  She’s only five but will be making cucumber salad soon enough. After all, it’s fun to run the tines of the fork down the length of a cucumber to make a design before slicing. Cucumbers, by the way, belong to the cucurbitaceae family as do melons, squash, zucchini and pumpkin and contain potent anti-cancer compounds. Thank you to Allison, and to Babcia Genevieve.  

My Babcia's Mizeria (Polish Cucumber Salad) by Allison Radecki 

My Polish grandmother’s 1970s American kitchen was a place of transformation. The Formica countertops (whose pastel boomerang pattern always made me think of scattered rubber bands) were surfaces where wooden spoons, mason jars, and stoneware crocks reigned.  This was a zone where things freshly picked from the backyard were crafted into dishes of incredible simplicity and deliciousness.  There was always a soup bubbling on the stove or something caramelizing in a pan, just waiting for a hungry grandchild to say, “Babcia, I’m hungry.”  To this day the scent of frying onions brings me back there, in a heartbeat.  

Standing at her kitchen sink in Cedar Grove, New Jersey, my Babcia, Genevieve Baranowski, could survey her domain.  Her backyard was a rolling expanse of grass and trees, complete with a stream (great for crayfish hunting), a goldfish pond, and a substantial vegetable garden, which was where the magic began.

Babcia’s first miraculous act was to transform red clay into black gold.  Nothing in her kitchen was ever wasted.  She knew how to incorporate peeled vegetable skins, coffee grounds, and eggshells into the soil, a spell which resulted in zucchini as large as baseball bats, and heirloom tomatoes you could barely palm with your hand.  Every skunk, opossum, and raccoon within a ten-mile radius was drawn to her vegetal treasures, against which she continuously waged war.

Spending time in her kitchen came with a specific vocabulary: szczaw (sorrel), buraki (beets) and, of course, the mighty kapusta (cabbage), which she fermented in her basement with the help of river stones, used to weigh down the shredded leaves in the brine.

Trips to a Polish family friend’s dairy farm were quite common.  The return journeys (with her wood-paneled station wagon’s windows rolled all the way down) not only brought raw milk back to her home, but also the finest dried cow manure, which she credited with the spectacular blooms on her roses and peonies.  

Since my Babcia and her family were keepers of secrets, her detailed history is still murky.  We know that she was born in Niagara Falls, New York, in November of 1913.  Her family made the bad decision to sell the profitable family glove factory and tavern and return to Poland in the early 1920s.  After an forced unwanted marriage in rural Poland, she ran away, boarding the M.S. Batory, an ocean liner of the Polish Merchant fleet, to return to the country of her birth during the Great Depression.  Before the beginning of World War II, she managed to bring her two sisters, also natural-born citizens, back to America, where they all worked as wartime riveters on the East Coast.  

Where and how my Grandmother learned to cook is still a mystery.  She knew how to braise, how to roast, and could craft an encyclopedia of sauces from memory.  Since my Great-Grandmother’s homemade donuts were rumored to break your toes if they fell on your foot, my Babcia’s skills were definitely not passed down the maternal line. My mother’s theory is that while working in Rockaway Beach, Queens as a domestic servant, her mother must have picked up on lessons taught in her employer’s kitchen.

Mizeria, a cold Polish salad of wilted cucumbers, sour cream, salt, and fresh dill, was a popular dish in my Babcia’s summertime kitchen.  In recent days, with East Coast temperatures rising to high levels, I have turned to it for its refreshing properties as a side dish, as well as for the family memories that accompany it.  It is perfect to bring along to a barbecue, guaranteed to cool off the heat of a summer afternoon.  

Though its gloomy name, Mizeria, is said to echo the fact that a Polish peasant’s life was full of misery, the dish leaves me with the opposite impression.   

When I taste it, I think of lazy days in the backyard.  I can see my grandmother, scented from tomato plant leaves, coming towards me from her garden with a basket of cucumbers.  We have a lot of peeling to do.    

Ingredients

- 2 large seedless English cucumbers (about 3 cups sliced)
- 1½ teaspoons salt
- 2 tablespoons chopped fresh dill
- ½ cup sour cream
- 2 tablespoons white vinegar
- ½ teaspoon freshly ground black pepper 

Directions. 

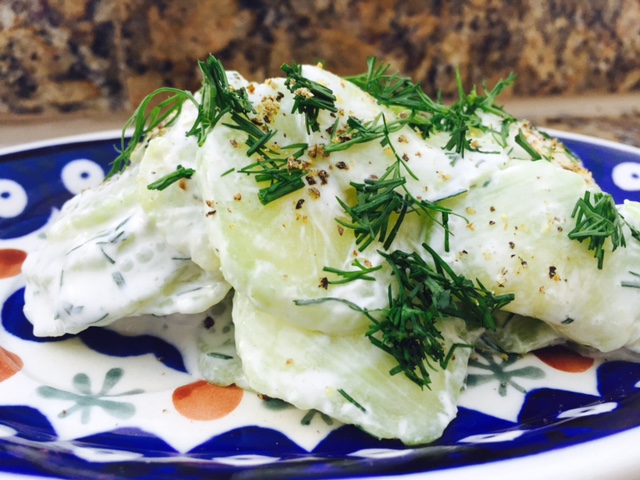
Peel the cucumbers.  Run the tines of a fork, lengthwise, down the entire outside of the peeled cucumber, so that it is scored with the points of the fork (this action will give the slices a pretty scalloped edge -- see below).

Slice the cucumber as thinly as possible (so you can see a knife through the slices) and place in a bowl.  Sprinkle slices with 1½ teaspoons salt and let sit for 30 minutes.

Drain water from the salted cucumbers and gently squeeze to expel remaining water.  Pat cucumber slices dry with paper towels.  

Toss cucumber slices in a medium bowl with sour cream, vinegar and dill.  Allow the salad to marinate in the refrigerator for about one hour.  Taste, adjust with salt and freshly ground pepper and serve. 

Mrs. Cubbard’s Raisin-Stuffed Cookies • Marie Simmons

Bretty Rawson

P1050176.JPG

Note from curator Rozanne Gold: Marie is a trove of handwritten recipes and stories.  An award-winning cookbook author and food writer, Marie Simmons wrote Bon Appetit’s “Cooking for Health” column for many years, and is the author of more than 20 cookbooks, including the wildly popular 365 Ways to Make Pasta, The Good Egg, and Lighter Quicker Better. Marie, a self-proclaimed story teller, is alight with thoughts of her mother and grandmother.  She says, “These two family cooks taught me how important it is to make sure everyone has something good to eat. I hear their words, and I do the same.”      

Mrs. Cubbard’s Raisin-Stuffed Cookies by Marie Simmons

Some children have play dates with friends.  My play dates were with my grandmother Nana and we had them every Saturday morning. We made stuffed cookies from a recipe from a lady, whom I can’t quite visual anymore, by the name of Mrs. Cubbard. She was a neighbor who had a boarding house and Nana helped her in the kitchen.

Nana and I needed to keep her large dark-blue canning pot filled to the brim with Mrs. Cubbard’s signature cookies.  You never knew when someone might stop by for coffee or iced tea or a   glass of cold milk.  What a smile it would bring to her face to know that sixty years later, I still keep a large container of cookie stuffing in my freezer so that I can prepare these nostalgic treats in a moment’s notice. 

Nana and I had an assembly line going as we sat at her big round table in the center of her kitchen. (She, cutting out the dough, and me, stuffing the cookies.) The cabinets were painted a deep Greek sea blue.  My Aunt Tess, the “decorator,” loved color so much that she filled her kitchen with her water colors and oil paintings and hung them on brightly-painted walls, making it quite festive. Imagine, ruffled white calico curtains billowing around the high-set windows that wrapped around the porch...and an apple pie cooling on the porch railing.

We began our morning by sipping weak tea.  We always shared a tea bag. And we chatted. Nana said I inherited her gift for gab and anyone who has met me knows that can’t be denied. I sure do like — make that LOVE — to talk. I seem to always have a story to share.

Mrs. Cubbard’s (Stuffed Cookie) Recipe is a basic sugar cookie made with shortening (shortening is so 1950s!) and sugar, milk, nutmeg, vanilla and egg. I still make it with shortening, somehow surviving the nutrition police. The recipe calls for a “stuffing” of raisins, lemon sugar, and chopped lemon.  I have updated the recipe with a filling of fig and prune.  Nana would roll the dough on her big flannel-covered table top. Her rolling pin was a long broom handle she bought at the hardware store. She would use the rim of a glass dipped in flour to press out rounds for the cookies.  It was my job to use her worn thimble (long misplaced, which makes me very sad) to cut out a circle out from the top of each round. Nana spread the raisin filling on the base of the rounds. I would carefully remove the thimble cut-out and hide it in my apron pocket so I could eat them later. Nana of course warned me, “Don’t eat the raw dough…you’ll get a tummy ache.” But I loved the taste of the raw dough. So I snuck it into my pocket and worried about the tummy ache later.  

My Saturday morning play dates with Nana, my mentor, my soul mate, taught me to think about food, to love the taste and feel of food, to write about food and to make me want to be a cookbook author.  I have now written more than twenty cookbooks with my latest, Whole World Vegetarian (Houghton Mifflin Harcourt), just published this month.  I think I’ll make a batch of Mrs. Cubbard’s cookies…and celebrate.   


Mrs. Cubbard’s Raisin-Stuffed Cookies

Makes approximately 12 cookies   

3/4 cup sugar
6 tablespoons shortening or butter
1 egg
1-1/2 teaspoons vanilla
1-3/4 cups flour
2 teaspoons baking powder
½ teaspoon nutmeg
½ teaspoon salt
Several tablespoons milk, if needed

Filling:
1 cup chopped raisins
½ cup sugar
½ cup water
2 tablespoons flour (dissolved in 2 tablespoons water)
Grated zest of 1 lemon (or 1 teaspoon lemon juice) 

Filling:  Put raisins in small saucepan with sugar and water. Bring the mixture to a boil and boil 2 minutes. Add dissolved flour and lower heat to medium.  Cook 5 minutes, stirring constantly, until mixture is soft, thick and dry.  Stir in lemon zest or juice.  Set aside and cool completely.       

To make cookies:  Beat together sugar and shortening (or butter.)  Beat in egg and vanilla.  Sift together flour, baking powder, nutmeg and salt. Fold into wet mixture.  Add enough milk, as needed, to make a roll-able dough.  Roll out onto floured surface to 1/8-inch thickness.  Cut with 2 or 2-1/2-inch round cutter.  Place on oiled cookie sheet and add 1 tablespoon raisin mixture to each cookie.  Top with another round cookie (the center cut out with thimble!) and pinch sides together.  Preheat oven to 350 degrees. Bake 12 to 15 minutes until just starting to brown. Let cool.

Note from RG: Instead of using a thimble to cut a small round from the top cookie, I used a tiny melon baller. 


Mother's Day Handwritten Recipe • Arthur Schwartz’s Marble Meatloaf

Bretty Rawson

Note from curator Rozanne Gold:  This priceless story, so perfect for Mother’s Day, is personal and poignant.  It comes from New York’s beloved Food Maven, Arthur Schwartz who happens to be one of my closest friends. We met each other in 1978 in the kitchen of Gracie Mansion, when I was the chef for Mayor Ed Koch and Arthur was the restaurant critic for the New York Daily News. Arthur went on become a legendary food writer and radio personality, but also a well-respected cooking teacher and “walking encyclopedia” of all things Italian, Jewish, and New York. His is a rich and riveting portfolio of knowledge and experience.  You can learn more about Arthur from his many cookbooks, including Jewish Home Cooking: Yiddish Recipes Revisited.  Many thanks to Arthur for his “Mother’s Day” essay – a treatise on food and memory for sure, but also one, quite fittingly, about the art of handwriting.  

Recipes My Mother and Grandmother Wrote by Arthur Schwartz

Elsie was a great and avid cook. My mother, Sydell, her daughter, was a good cook, but she never had the enthusiasm for cooking that Elsie had. It’s obvious from her recipes, however, that she at least wanted to continue family food traditions, which she did, more or less, after my grandmother died. Most of her recipes in that folder, written in my mother’s very neat, even beautiful, penmanship, are from my grandmother’s repertoire. I can tell which were written by Elsie herself because my grandmother’s handwriting was sloppier than my mother’s, though derived from the same New York City standard as my mother’s, and, in fact, my own handwriting, which is somewhere between the two in clarity.

We all learned the same style of penmanship in New York City schools. Called The Palmer Method, it was taught in New York from the late nineteenth or early twentieth century (as far as I can tell) until relatively recently, when cursive writing ceased to be taught altogether. When we all grew up, however, examples of The Palmer Method in which we were mercilessly drilled, was exemplified over every elementary-school blackboard in an alphabet printed on oak tag. For the longest time, I have been looking for a cache of recipes in a manila folder, mostly for Passover, handwritten by my grandmother and mother. They were on odd slips of paper, on the backs of envelopes (my grandmother’s favorite “note” paper, it seems), or scribed onto pages torn from notebooks. Some are mere ingredient lists, some have full or sketchy directions. But for the life of me, for years I couldn’t find them until just a few weeks ago.

Spring cleaning my office, I came across them in time to motivate me to make one of my family’s favorite Pesach dishes for our Seder. It is sweet potato and prune tzimmes, a sweet and sour casserole flavored with a goodly amount of flanken, which, to the Yiddish cook, is short ribs cut across the bone instead of between the bones. It’s one of the few recipes of my maternal grandmother, Elsie Binder Sonkin, that I have not published during the 47 years I have been a food writer and editor, and I was happy to see it outlined in my mother’s neat cursive. It was delicious, by the way.

The most thrilling recipe I found in that folder, however, was not any of my grandmother’s, most of which I have already published in books, newspaper columns and magazine articles, but my own. It is for a meatloaf I created about 30-something years ago (before I would have put it on my computer) for the birthday of my long-time partner and now legal spouse, Bob Harned. Bob has fond memories of this meatloaf recipe, which was published in a weekly column called “Sundays in the Kitchen with Arthur” that I was writing for the New York Daily News Sunday magazine. I called it Marble Meatloaf, because it is streaked with spinach. Bob has asked me to make it again from time to time, but I’d lost track of the exact recipe. I am sure the magazine it appeared in is packed in one of the many archival boxes in our storage locker, but I’ve never gotten the energy to pursue the search.

Sydell’s handwritten version to the rescue, a gift from my mother, who died 26 years ago, on Mother’s Day. I think I have to make it this weekend.

Arthur Schwartz’s Marble Meatloaf

Ingredients

1 medium onion, finely diced
2 tablespoons butter or oil
1-1/2 lbs. ground chuck
½ cup fine dry bread crumbs
½ cup milk or water
1 egg
1 teaspoon salt
½ teaspoon freshly ground black pepper
1/8 teaspoons freshly ground nutmeg
3 to 4 tablespoons grated parmesan cheese
10-ounce package chopped spinach, thawed
Serves 4

Directions

  1. In a small skillet, sauté onion in butter until golden, about 8 minutes. Meanwhile, combine bread crumbs and milk; let stand so crumbs absorb milk, then, with a fork, beat in the egg. 
  2. Take the chopped spinach in small handfuls and squeeze out excess moisture. 
  3. In a large mixing bowl, combine the ground beef, the sautéed onion, the bread-crumb mixture, salt, pepper, nutmeg, and grated cheese. As you add the ingredients, distribute them around the surface of the meat, don't just plop them in. 
  4. With your hands, blend everything together until mixed well. Add the spinach and mix again, just until all the ingredients seem equally distributed. Don't overmix or knead the meat. 
  5. Turn the meat mixture into a rectangular baking dish and pat into a rye-bread shaped loaf about 4 inches across at the bottom and tapered towards the ends. Bake in a pre-heated 350-degree oven for 50 to 60 minutes, depending on doneness desired. Let rest  5 minutes before serving. Serve hot or at room temperature.  

The Talloczy Family’s Hungarian Stuffed Peppers • Allison Radecki

Bretty Rawson

Note from curator Rozanne Gold: This week’s recipe comes to us via New York City caterer, professional chef, and former restaurateur Irene Khin Wong. It is an old Hungarian recipe, inherited without modifications, from the family of her Hungarian partner, Zsolt Talloczy. Three generations of Hungarian women have embraced this recipe, beginning with Zsolt’s great grandmother, Franciska, his grandmother, Anna, and his mother Agnes Zatonyi Talloczy. It is lovingly fastened to Zsolt and Irene’s refrigerator door. With that, a fourth generation now makes the treasured recipe in late spring and early summer, when tomatoes and wax peppers are freshly available. I especially love the grace and styling of Agnes’ European handwriting. With thanks to Irene and Zsolt for sharing this recipe — one that reminds me of my own childhood with my own beautiful Hungarian mother.

The Talloczy Family's Hungarian Stuffed Peppers By Allison Radecki

These lusty stuffed peppers remind Zsolt Talloczy of a cherished childhood and memories of his mother and grandmother. When he prepares them, he wistfully said, “It smells like spring and lazy sunny afternoons in Budapest.” Whiffs of the dish also dish trigger thoughts of his wife Irene’s first trip with him to Budapest and his parents’ home nearly 10 years ago.

Irene and Zsolt first made each other’s acquaintance while waiting to pick up tennis permits within a sporting goods store off of New York City’s Union Square. Zsolt, a trained scientist who now works in microbiology, was studying at Columbia University at the time. 

“I wearing pajamas on a Saturday afternoon,” remembers Irene. “I had worked a late night, until 3 am, and just threw on a long jacket to accompany my eager friend to fill out the permit forms. ‘Who cares if you’re wearing pajamas,’ said my friend. WHO is going to see you?’”

A quick chat about tennis skills led Zsolt to offer Irene his e-mail address (“he didn’t even have a cell phone”). After a few e-mail exchanges, they met up to play. Irene then proposed that they meet up another day at the iconic Jewish appetizing store, Russ and Daughters, before trying out courts on the Lower East side.  

“I figured that everyone in New York knew Russ and Daughters,” said Irene, who originally hails from Burma, “but Zsolt never arrived. I couldn’t call him, he had no cell phone, so I waited.  Sitting in front, while eating my bagel and whitefish, I saw him running by. I almost missed him. I think I gave him the wrong address.”  After an extended trip to Asia together (“four countries in six weeks and we never had an argument”) the couple realized that they had found a rare match, indeed. 

A trip to Budapest was next on the horizon. “I remember thinking how Budapest was almost like Paris—but in the 1960s. Zsolt’s father, Imre, would buy trays and trays of different types of pastries—the most incredible pastries — it was like something you would get in Paris or Vienna.” 

Zsolt’s mother, Àgnes, made these stuffed peppers for Irene to welcome her to Budapest. “Zsolt knows that I can eat spicy. They were so flavorful. It reminded me of home.”

The prototype for this family dish originated in Hungary and is based on a traditional recipe with some German-Hungarian influence from Budapest’s ninth district, Ferencvaros/Franzstadt. This zone was considered the ‘stomach of Budapest’ with a multitude of blooming family businesses, restaurants, butcher shops, and bakeries. It was the neighborhood where Budapest’s first chocolate factory, and famous brandy factory (Zwack Liqueur, maker of the beloved national digestive herbal drink, Unicum) were located, as well as the capital’s central slaughter house. 
 
The typical pepper used in its preparation is the Hungarian Hot Wax Pepper variety, which is fragrant, smooth and ripens like the sunset from yellow to orange to red. This pepper, or paprika, as it is called in Hungarian, is usually harvested before maturity when its skin exhibits a yellow-greenish hue. It is easy to stuff and peel and produces fruits whose ends taper to a rounded point. Alternatively, you can make it with green bell peppers. 
 
As anyone who has visited Hungary knows, you can hardly walk ten feet without encountering this pepper — whether it is threaded onto strings and hung from balconies to dry in its reddest, most mature state, piled high in a fragrant yellow tower in a food market, or taking its traditional place, in its red, pulverized version (as the ground spice, paprika) alongside the salt and pepper shaker on most Hungarian tabletops.

Zsolt is the chef when it comes to this family stuffed pepper dish which he cooks for Irene, so they both can remember their flavors of home. A yearly import of two kilos of Hungarian paprika, which his parents buy directly from a small producer in the nation’s Szeged region (and Zsolt carries back to New York on the plane) allows him to truly capture those authentic flavors. Zsolt also regularly imports frozen portions of his mother’s home-cooked stuffed peppers for his wife when she can not accompany him back to Budapest for his yearly visit  “Àgnes freezes the peppers in a container, which she then wraps in three or four Ziploc bags,” describes Irene. “The dish is still cold by the time the plane lands.” Talk about take away.

As the famous Hungarian restaurateur and restaurant consultant, George Lang, wrote in his book, The Cuisine of Hungary, "Paprika is to the Hungarian cuisine as wit is to conversation- not just a superficial garnish, but an integral element…the marriage of paprika and Hungarian cooking was almost predestined." Considering that the wax pepper originated in the New World and made its way into to Hungary by way of the Turkish invasion in the 1500s, it covered a lot of ground before reaching its most famous culinary destination.


Hungarian Stuffed Peppers 

For the Stuffing (to be prepared first):

1-3/4 pounds ground pork   
Scant ½ cup raw rice      
2 cloves of finely chopped garlic
1 hot pepper (jalapeño will do), finely chopped   
2 tablespoons smoked bacon, chopped      
1 teaspoon of Hungarian hot paprika
A pinch of dried marjoram
A pinch of ground cumin
1 whole egg, beaten
Salt and pepper to taste

For the peppers and cooking liquid:

6 tablespoons flour  
Pork lard or oil
4 cloves of garlic
¼ cup Hungarian paprika powder (sweet or hot)
2 liters of tomato juice
8-10 Hungarian wax peppers (with seeds and stems removed)

1. In a large bowl, mix all the ingredients for the stuffing and set aside. 

2. Brown flour in melted lard or oil until it turns light brown in the pot. Add chopped garlic and cook several minutes until soft (but not brown.)  Add ¼ cup paprika to begin (add as much as you like according to taste – a mixture of sweet and hot paprika) and immediately remove pot from flame to avoid burning the paprika. 
 
3. Pour in 2 liters of tomato juice and break up any clumps of flour by stirring. Simmer on low heat for 5 minutes to concentrate
 
4. Cut the Hungarian waxed peppers (8-10) around at the stem and pull out the seeds. 

5. Fill the peppers with the stuffing. Any leftover stuffing can be rolled into meat balls. Add stuffed peppers to a separate pot from the tomato liquid, add any ‘naked,’ leftover meat balls a bit later to the pot. Fill the pot with water to cover all peppers.  Salt and simmer for 30-40 minutes
 
6. When the stuffing in the peppers is cooked through the middle (cut and test to see when ready), transfer them to the tomato liquid pot and fill up with some chicken or beef broth as needed. Simmer on low heat for 10 minutes while constantly stirring to finish.


Sue Inoff's Double Crust Lemon Pie • Dale Bellisfield

Bretty Rawson

From curator Rozanne Gold:  This scrumptious recipe was submitted to Handwritten by Dale Bellisfield. From a fabulous career as one of New York’s premier graphic designers, she transformed herself into a clinical herbalist (and holistic nurse) who now makes her home in Pine, Arizona. Dale has a practice in integrative medicine and, like Hippocrates, thinks of food as medicine. She is a wonderful cook who once created a dish of black rice with gorgonzola, porcini and espresso for me. I am so grateful to have her wonderful mother’s handwritten recipe, and to share Dale’s memories. www.herbaldale.com    

Sue Inoff's Double Crust Lemon Pie by Dale Bellisfield

I just dug this out of my overstuffed, seven-inch-thick file, a jumble of recipes I've been gathering over the past two years as inspirations for a “breast health” cookbook I’m working on.  It fell out of the file so easily, it was like my Mom was saying hello. This copy of the recipe was meant for my two sisters, Joanne and Sally, and me. And it is one I will happily share with my daughter Samantha, and now with all of you!     

My mother’s Double Crust Lemon Pie was her signature, and our favorite among many of her delicious home-made dishes.  She was an adventurous and excellent cook, and a foodie before there was even such a designation. Much to my Dad's anxiety, though, she loved to experiment with new recipes whenever they hosted an event — be it birthday party, July 4th gathering, Thanksgiving dinner, family home-coming, baby shower, whatever. Although I never caught a whiff of any failures, this one was an experimental blockbuster-turned-mainstream, with many repeated command performances. And it never made Dad anxious.

Only Mom complained about it. She would rail about how time-consuming it was to slice those lemons "paper thin" after having grated and peeled them. And about the effort of making the two crusts it needed. But we didn't really care. We were only consumed with selfish greed about devouring that pie sometime in the very near future. Please, Mom??

This particular dessert was most often associated with our annual "crab fest" dinner, held in the hot Maryland summer at my folks' house. It was a big gathering of friends, neighbors and family that filled our entire basement. And it celebrated the peak of  Maryland’s blue crab season. Every year we looked forward to the slimy, messy ritual of cracking open those bright red, steaming-hot, juicy crabs onto tables covered with layers of newspaper to absorb the excitement and the entrails. No plates. 

There was a certain skill to separating the sweet, briny crabmeat from their tenacious salt and spice-encrusted shells. And as you cracked open the claws, and then sucked out the shell fragments to catch whatever fleshy morsels might still remain, your mouth/eyes/sinuses all dripped from the inescapable fiery spices caked on the shells, on your fingers, on your napkin and on your beer. But we knew relief was coming.

The lemon pie. This made it all calm down — the lemony sweetness of the creamy filling, the hit of those paper thin, gloriously tart lemon slices suspended within it, and the cinnamon-y crust. They formed the most exquisite combo of flavors that perfectly balanced the intensity of the spiced crabs and beer. More than 30 years have passed since I last ate that pie. But I can taste it still.  Suddenly it feels like it’s summer.

pie w recipe copy.jpg
 

Sue Inoff's Double Crust Lemon Pie

2-1/2 cups sugar
4 tablespoons flour
1/4 teaspoon salt

1/2 cup butter, room temperature
6 eggs (reserve 1 teaspoon egg white for top crust)
3 large lemons
1/2 cup lemon juice
(squeeze from additional lemons)
1/2 cup water
cinnamon-sugar for sprinkling
 

1. Preheat oven to 400 degrees. 

2. Roll out bottom crust into pie tin.  

3. In a mixing bowl, add sugar, flour and salt.  Blend in butter and eggs until well mixed.  Grate lemons to get 2 teaspoon zest.  Add to bowl.  

4. Cut rind and white pith from 3 lemons and slice lemons very thin.  Add lemon slices to bowl with lemon juice (squeezed from additional lemons) and water.  Stir well and pour into bottom crust.

5. Cover with top crust, sealing (I dampen bottom crust edge) and fluting edge.  Brush top pie crust with egg white and sprinkle with cinnamon and sugar.  

6. Bake for 30 to 40 minutes.

** Note from RG: Prepare enough pie crust for a deep-dish 9 or 10” pie, top and bottom crust. Place pie on baking sheet. Let cool before serving.


Connie Love’s Irish Soda Bread • Allison Radecki

Bretty Rawson

Note from curator Rozanne Gold: I adore Irish Soda Bread and don’t eat it often enough.  That will certainly change now that I have this fabulous recipe from Connie Love.  Not only is her version filled with love and lore, but is lovingly written by Allison Radecki, who interviewed Connie for this story.  It’s “Handwritten” doing what it does best. The recipe is written in Connie’s hand on thin, yellowed paper which she keeps protected, slipped into a small plastic sleeve. It is marked with lines and revisions. Many thanks to Connie, Allison, and her mother, Joanna.   

Connie Love's Irish Soda Break by Allison Radecki

There are some homes where everything you see has a story attached to it; a place where life is lived in the company of objects that keep the memories of loved ones alive and where the spirit of a bygone era is still gloriously vibrant.   

Such is the home of Connie Love, a close family friend with whom I have been lucky enough to share friendship, much kindness, and lots of laughter in both easy days and tough times over the years. A lover of recipes and a wonderful cook, Connie is the type of friend who will call you to say that there is an extra jar of homemade minestrone with your name on it, waiting for you on her front stoop. “Just remember to stop by and pick it up.”  

My mother, Joanna, worked alongside Connie for many years as a realtor in Montclair, New Jersey, and benefited from many such surprises that emerged from Connie’s generous kitchen. Since Connie’s retirement, the two of them still manage to share adventures, whether it is an impromptu movie night or a game of Pickleball, the fantastically named hybrid of tennis and ping-pong, at the local YMCA.

In celebration of various holidays, Connie’s baked goods would appear in our home and soon be reduced to a plate of crumbs. This is how I first encountered her Irish soda bread, which often accompanied the first days of Spring and the Saint Patrick’s day season.

One afternoon this March, my mother and I sat down in Connie’s meticulous kitchen to talk about her soda bread recipe and found ourselves engaged in a whirlwind of memories, photographs, and stories. The recipe for her soda bread came from her mother, Amelia Malanga Ianucci (known as Minnie).  Minnie, one of 14 children, was born in Newark, NJ, in 1895. She received this recipe as 17-year old bride from Mrs. Pollack, an Irish neighbor whose apartment shared a door to the same fire escape in a Newark tenement building. The recipe was said to be ‘the poor man’s soda bread’ since it did not use eggs or butter.

“My mother and Mrs. Pollack socialized on the balcony. Their apartments were side-by-side.  The basement was filled with crocks with pickles and peppers. They kept the coal in the basements for the coal stoves.” Connie (Columbia Ianucci) and her twin sister, Betty (Elizabeth) were born in the midst of The Great Depression on Clifton Avenue in Newark, not far from The Cathedral Basilica of the Sacred Heart. “No one had a cookbook. No one had measurements. They just knew,” said Connie. “My mother knew the dough for knots.  She knew the sweet crusts for Easter pies.  My sister said, ‘we didn’t make an effort to know, so we didn’t know.’” Because of this, Connie, herself a young bride, had her mother dictate her soda bread process as she committed the steps to paper. Connie figures that she wrote the recipe down in the 1950s when she was already married and running her own house.  

“The tenements smelled, not of garlic and food, but of bleach. The women would bleach the wooden floors until they were almost white.” Bleach was delivered to the women in the tenements by the bleach salesman. “These women didn’t have cars. They didn’t go to the stores.”  She remembers the Jewish peddlers who sold linens, which her mother would buy — a tablecloth here, a sheet there — slowly stocking the Hope Chest for her and her sister. “The Stanley guys sold brooms, house products…brushes. The insurance guy came by to collect the insurance premiums — ten cents, twenty cents.”  

A network of other relatives lived close by. Connie’s Grandmother’s tenement was on Stone Street. Aunt Tilly lived downstairs. Uncle Arthur and Aunt Ella lived in different tenements in the area. Connie’s father, Stephen Ianucci, was born in Italy in 1890. Connie remembers that at night, her father would read the paper out-loud and her mother would correct him, in an effort to erase his Italian accent. Dinner was always served at 5:30 p.m.

Connie reminisced some more.  How she and her sister would harmonize with their mother as they washed the dishes -- “we had no tv and the radio was on top of the fridge. The Green Hornet, music, all sorts of shows.”  And she remembered the big black stove with the chrome piece which she would have to polish when her grandmother said “Vieni qua."

Sadly, it was time for us to go. But I’ve got Connie’s recipe and an invitation to come back again. There would be more stories to tell. 


 Connie Love’s Irish Soda Bread

8 cups flour
3/4 cup of sugar
4 tsp. baking soda
2 tsp. baking powder
2 tsp. salt
2 cups of raisins
1 tsp. caraway seeds
About 4 cups of sour milk
(buttermilk or whole milk with one
tablespoon of lemon juice mixed in)

1. Sift dry ingredients together. Add 2 cups of raisins and caraway seeds, if desired. Add 4 to 5 cups of buttermilk (or whole milk with lemon juice). Mix to hold together.  

2. Knead for 1 minute or just mix (not too soft, although never fails, whatever the texture). 

3. Bake at 375 for 40 minutes until golden brown (loaf pans or a cake pan). 

This recipe makes 3 loaves, which freeze well and are delicious when toasted.


Bettymarie's Peach Meringue (Schaum Torte) • Lari Robling

Bretty Rawson

IMG_0028.JPG

A Note from Curator Rozanne Gold: This engaging story comes from Lari Robling, an independent radio producer and writer, currently producing “Voices in the Family” with Dr. Dan Gottlieb for WHYY in Philadelphia. A special pot of tea, carefully placed next to a handwritten recipe card, sets the scene to unlock the secrets to Bettymarie’s Peach Meringue. The card’s yellowed hue and tell-tale splotches hints at past mishaps, while a faded cursive “what’s cookin,” specifies Mom as the author, even calling her by name. Yet the story is not all peaches and cream. The cracked exterior of the cake becomes the metaphor for a complicated mother-daughter relationship, whose sweetness and love stand the test of time. A former restaurant critic for the Philadelphia Daily News, Lari is the author of a wonderful cookbook, Endangered Recipes, published by Stewart, Tabori & Chang. Lari believes that nostalgic memories created by food are the most evocative and compelling of all, especially if they’re handwritten. Thank you, Lari. Twitter handle @larirobling.

Bettymarie's Peach Meringue By Lari Robling 

My mother was a terrible cook. I was about eight years old when I realized that calling the fire department wasn't a step in a recipe. Her impoverished cooking skills were always a puzzle because her mother, my grandmother, was an amazing cook. Grog's pies were legendary and people would find a reason to stop by around dinner — there was always enough food in the pot, and enough room around the table to set another place, or two, or even four! Yet, my mother left that home sadly lacking the ability to put a simple meal on the table. Maybe it’s no coincidence that I became passionate about food later in life.  

There were, however, one or two things she did learn from my grandmother, and my brother and I were grateful for them. One such confection was a mass of fluffy whiteness covered in whipped topping and decorated with fruit. Despite its light texture, and much to our mother's chagrin, we called it Cement Cake. Although she took this as one of endless insults attached to her skill-less cooking, it was an apt description of what the cake looked like prior to being dressed up with fruit and cream — a cracked sidewalk. 

This dessert is Pavlova-like (sometimes called Pavlov), and baked in a spring-form pan rather than laboriously piped out of a pastry bag.  Preparing it this way results in a dreamy, marshmallow-like interior encased in a brittle shell. 

The original version came from my grandmother's neighbor and called for “tinned peaches.” Over time, we swapped the canned peaches for fresh, or sometimes substituted fresh strawberries or blueberries, or other fruit in season. I've even used kiwi, which adds a nice tart contrast to what is basically a very sweet meringue. But the most exciting version was the one I made with the gooseberries from my backyard bush.

Eventually, the non-dairy whipped topping gave way to whipped heavy cream.  And what I’ve learned is that the recipe is almost foolproof, as even my mother could make it reliably.

I was always curious about the origin of this recipe — did some cook lack a pastry bag and plop a Pavlov into a spring-form pan? Was this dish a regional Ohio thing where I was from? I finally found the answer when researching my book, Endangered Recipes and read The Molly Goldberg Jewish Cookbook. There it was — Schaum Torte, a flour-less cake for Passover (that explained the non-dairy topping!).

I wonder how many countless handwritten recipes such as this one were passed over fences or across clothes lines over the years?  From neighbor to neighbor, from mother-to-daughter, and now mother-to-son (my son Ben devours it anytime I make this cake), it is a beautiful testament to the nurturing bonds we share.

It’s nice to have a sweet memory of my mother to mollify our sometimes contentious relationship.  And I don’t call it Cement Cake any more. 


Bettymarie’s Peach Meringue 

Cake

6 egg whites
2 cups, sugar
2 teaspoons, vanilla extract
2 teaspoons, apple cider vinegar

Topping

2 cups, heavy cream
1 pint, fresh strawberries, hulled and halved
(reserve some whole for garnish)
or fresh fruit of your choice.

1. Preheat oven to 300 degrees F.

2. To make the cake: Using an electric mixer, beat egg whites until stiff. Add sugar slowly while beating at slow speed. Blend in vanilla and vinegar. Spoon batter into a 9-inch springform pan. Bake for 45 minutes. Remove cake from oven and let cool (it will deflate and crack; don't worry you cover the whole affair up).

3. To make the topping: Just before serving, whip cream. Arrange fruit on top of cake, reserving some for garnish. Spread the cream on the top and sides of the cake. 

 
black_ink copy.png